Quick Start
This page takes you from a Core 3588E module to a system that has started up on a carrier board.
The steps use the Leetop A206 carrier board, the carrier board used throughout this documentation. On another carrier board, the ports are in different places, but the order of the steps is the same.
What you need
Core 3588E is a module without ports of its own, so you need:
- A carrier board that supports the Jetson TX2 NX, for example the Leetop A206. See Carrier Boards.
- A power adapter for the carrier board. For the Leetop A206, a DC adapter of 9 V to 19 V that supplies 3 A. See Power Supply.
- A heatsink. The Core 3588E Heatsink has a fan that the carrier board controls.
- A monitor with HDMI or DisplayPort, and its cable.
- A USB keyboard and mouse.
- An Ethernet cable to your router, to reach the internet and to log in over SSH.
Not needed for a first start, but useful later:
- A micro-USB data cable, to install an operating system
- A USB to TTL serial adapter, to reach the serial console when there is no monitor
With the server edition of Mixtile OS, you can leave out the monitor, the keyboard and the mouse. Connect only the Ethernet cable and the power adapter, then log in over SSH as described in Connect to Core 3588E.
Installing the operating system
Core 3588E starts the system on its eMMC. To install Mixtile OS or change to another edition, follow Flashing an OS Image once the module is on the carrier board, then come back here to connect and power it on.
Step 1. Seat the module on the carrier board
Do this with the carrier board unplugged from power.
- Hold the module with its components facing up, and line up the notch in its gold edge with the key in the carrier board's SO-DIMM socket.
- Insert the edge fully into the socket at an angle, then press the module down flat onto the carrier board.
- Fasten the module to the carrier board with the two screws.
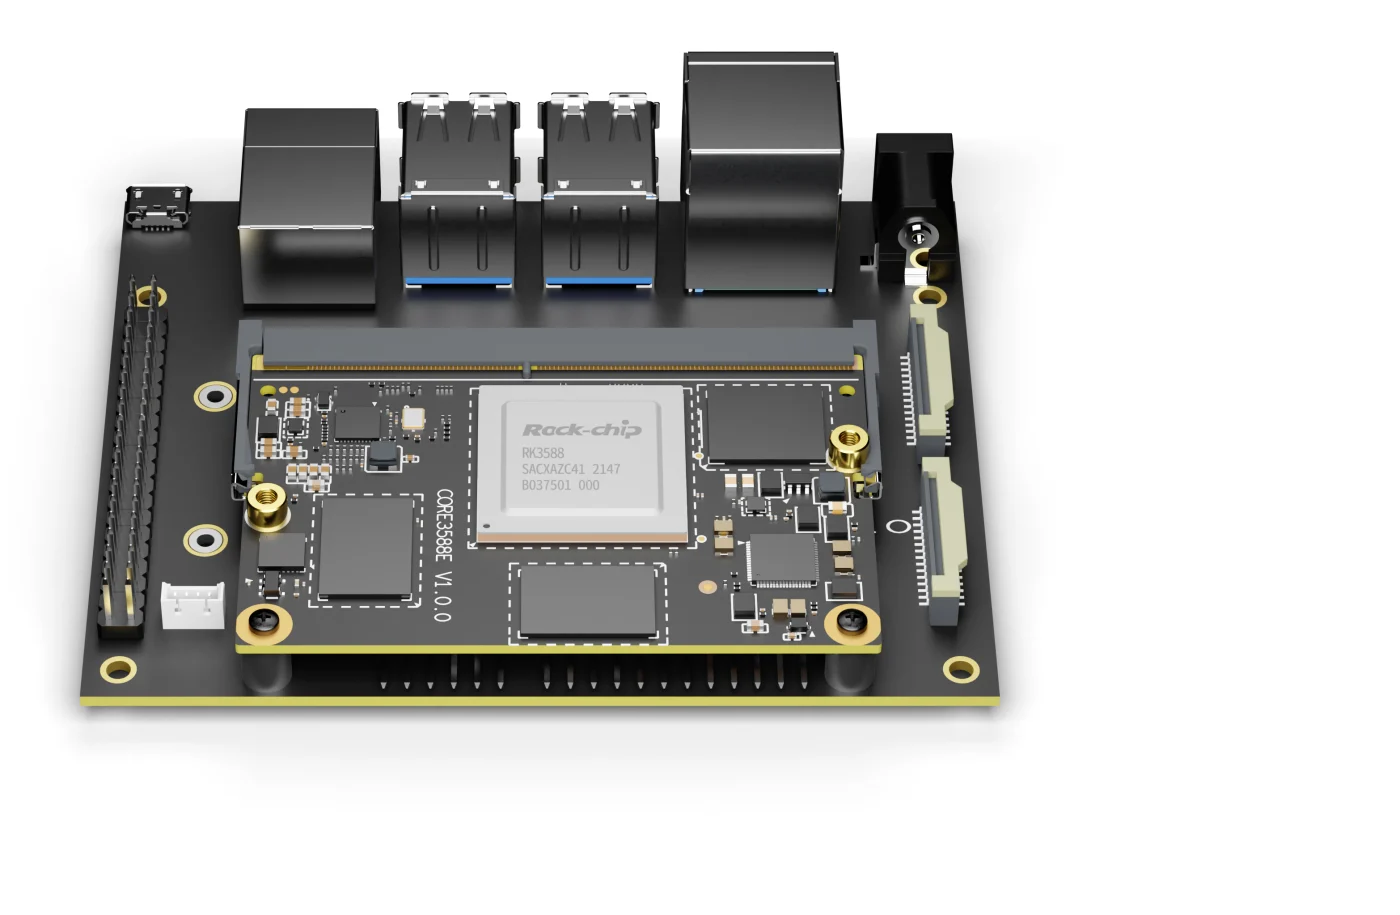
Figure 1. Core 3588E seated and fastened on the carrier board
- Mount the heatsink on the module, and connect its fan cable to the fan header of the carrier board. See Accessories.
Step 2. Connect the cables
All the cables go to the rear edge of the carrier board. Connect them in the order of Figure 2, with the power adapter last.
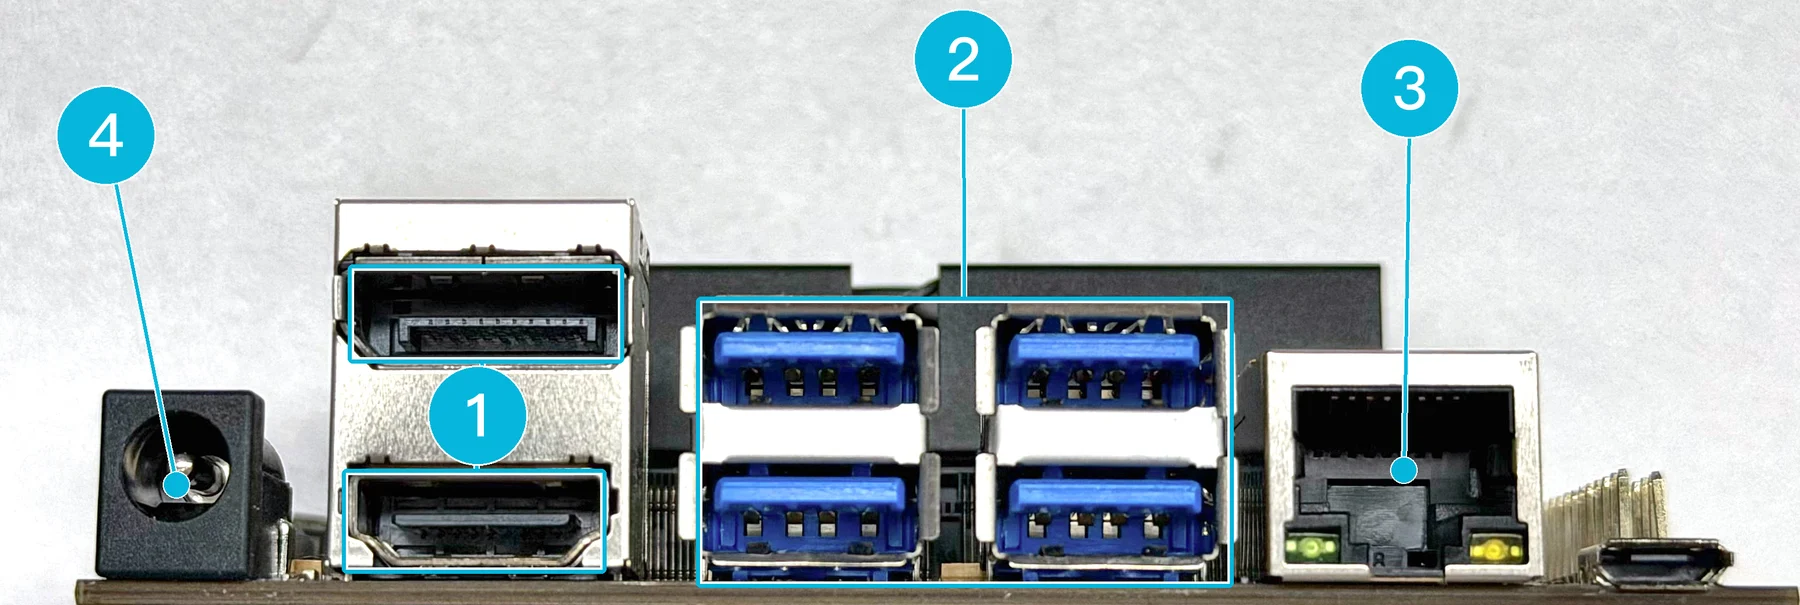
Figure 2. The connections for the first start, in order
- Connect the monitor to the HDMI port, the lower half of the stacked connector, or to the DP port, the upper half.
- Connect the keyboard and the mouse to two of the USB 3.0 ports.
- Connect the Ethernet cable to the Ethernet port, and the other end to your router.
- Connect the power adapter to the DC power jack, and plug the adapter in.
For every connector of the carrier board, see Hardware Information.
The carrier board starts Core 3588E as soon as power is connected. The power LED next to the micro-USB port starts blinking once the system is running.
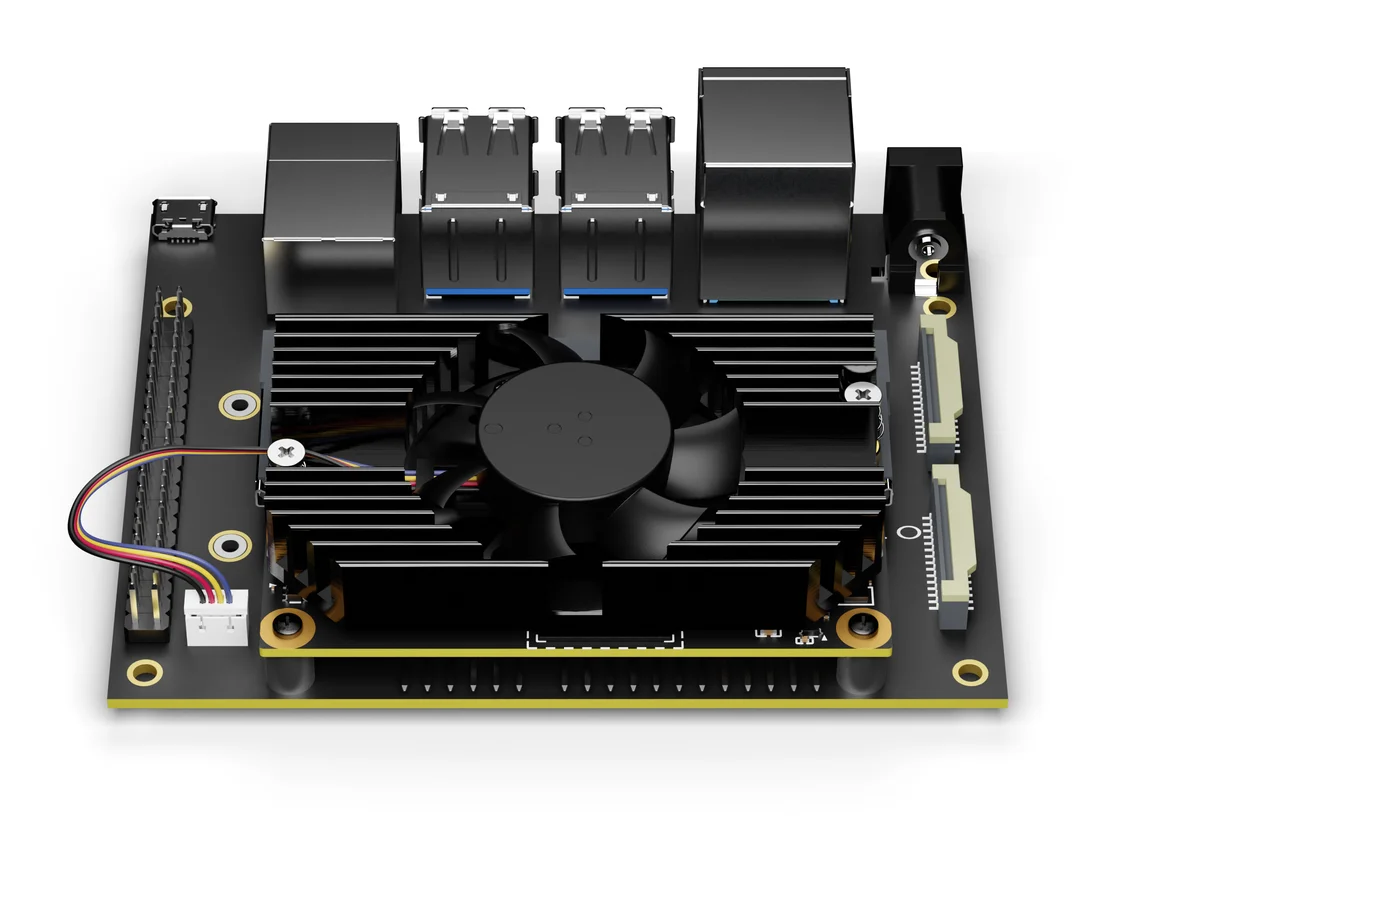
Figure 3. Core 3588E with the heatsink, on its carrier board
After power-up
Once the system has started:
- Desktop edition: the GNOME desktop appears on the monitor, already logged in as
mixtile. - Server edition: a
mixtile-core3588e login:prompt appears on the monitor.
On the server edition, log in as mixtile with the password mixtile. The login details are in Mixtile OS.
To check that the system is running and on the network, open a terminal and run:
ip -brief address
The Ethernet interface shows UP and an IPv4 address from your router. Use that address to log in over SSH.
If the monitor stays blank, check that the power LED of the carrier board is blinking, then connect the serial console to see whether the system is starting. For other carrier boards, see Display.