M.2
The two PCIe interfaces of Core 3588E reach M.2 sockets on the carrier board:
| Socket | Interface | For |
|---|---|---|
| M.2 Key M | PCIe 3.0 x4 | NVMe SSD |
| M.2 Key E | PCIe 2.1 x1 | Wi-Fi and Bluetooth card |
On the Leetop A206, both sockets are on the bottom side of the carrier board: the Key M socket is J11 and takes 2280 SSDs, and the Key E socket is J10. See Hardware Information.
Install the SSD and the card with the carrier board powered off. A card added while the system is running is not detected until the next power-up.
Mixtile OS always starts from the eMMC, so an SSD is used for data, not as the system disk. The commands on this page are for Mixtile OS.
NVMe SSD
Install the SSD
- Disconnect the power adapter from the carrier board.
- Line up the notch of the SSD with the key of the M.2 Key M socket, and insert the SSD at an angle.
- Press the SSD down and fasten it with the screw.
- Connect the power adapter.
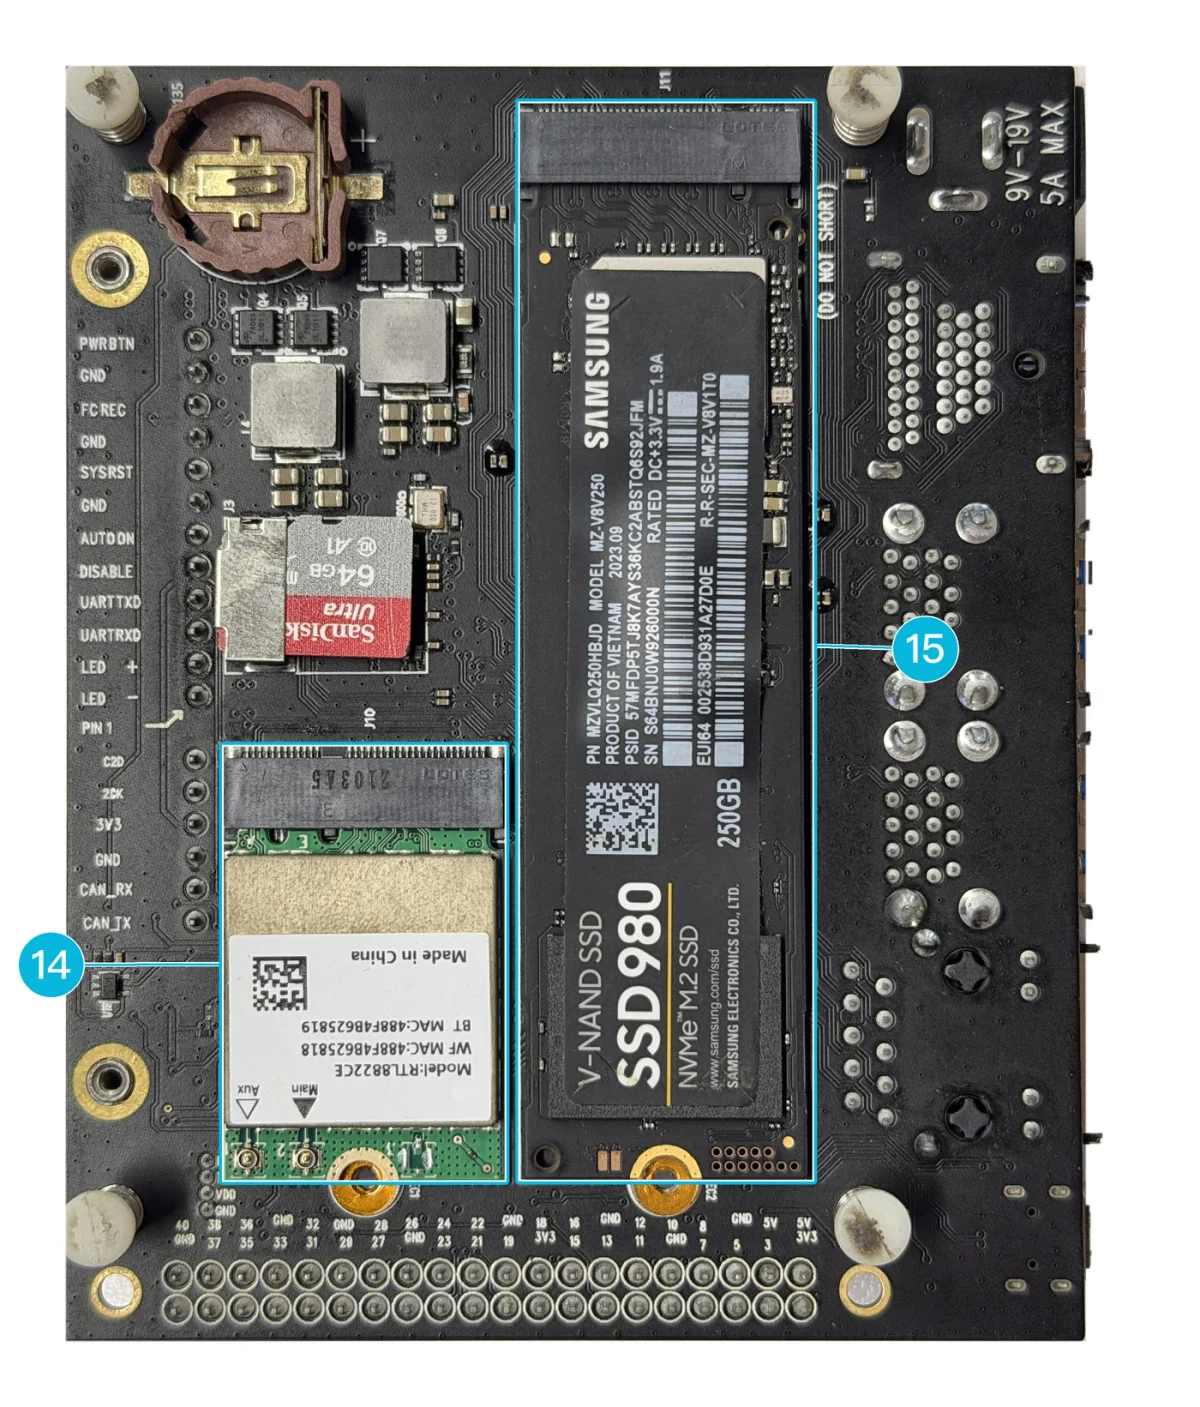
Figure 1. An NVMe SSD in the M.2 Key M socket (15) and a Wi-Fi and Bluetooth card in the M.2 Key E socket (14)
Check the SSD
lsblk -d -o NAME,SIZE,MODEL
Expected result: the SSD is listed as nvme0n1, with its size and model:
NAME           SIZE MODEL
mmcblk0      115.3G
mmcblk0boot0     4M
mmcblk0boot1     4M
mmcblk1       59.5G
nvme0n1      238.5G PUSKILL 256GB
mmcblk0 is the eMMC of the module, and mmcblk1 a microSD card, if one is inserted. The PCIe 3.0 link runs at up to 8 GT/s on four lanes. To see the speed the SSD is using, run sudo lspci -vv | grep LnkSta.
Format and mount the SSD
A new SSD has no file system. The steps below create one partition over the whole SSD and mount it at /mnt/ssd.
Formatting deletes everything on the SSD. Check the device name with lsblk first.
-
Install
partedand create a partition table with one partition:Core 3588Esudo apt updatesudo apt install -y partedsudo parted -s /dev/nvme0n1 mklabel gpt mkpart data ext4 0% 100% -
Create an ext4 file system on it:
Core 3588Esudo mkfs.ext4 /dev/nvme0n1p1 -
Mount it:
Core 3588Esudo mkdir -p /mnt/ssdsudo mount /dev/nvme0n1p1 /mnt/ssd -
To mount it at every start, add it to
/etc/fstabby its UUID:Core 3588Eecho "UUID=$(sudo blkid -s UUID -o value /dev/nvme0n1p1) /mnt/ssd ext4 defaults,nofail 0 2" | sudo tee -a /etc/fstabWith
nofail, the system still starts if the SSD is removed.
On the desktop edition, you can also format and mount the SSD with the Disks application.
Wi-Fi and Bluetooth Card
Install the card
- Disconnect the power adapter from the carrier board.
- Insert the card into the M.2 Key E socket and fasten it with the screw.
- Connect the antennas to the card.
- Connect the power adapter.
The card is shown in the M.2 Key E socket in Figure 1.
The card needs a driver in Mixtile OS. Cards with a Realtek RTL8822CE chip work without any setup.
Check the card
nmcli device
Expected result: a wifi device is listed, for example wlP2p33s0.
Connect to a Wi-Fi network
-
List the networks in range:
Core 3588Enmcli device wifi list -
Connect, replacing
<SSID>and<password>with those of your network:Core 3588Esudo nmcli device wifi connect "<SSID>" password "<password>" -
Check that the Wi-Fi device has an IP address:
Core 3588Eip addr
The connection is saved and reconnects automatically after a restart. On the desktop edition, you can also connect from the network menu at the top right of the screen.
Use Bluetooth
The Bluetooth side of the card is managed with bluetoothctl, from the bluez package:
sudo apt install -y bluez
bluetoothctl
At the [bluetooth]# prompt, run scan on to list the devices in range, pair <address> and connect <address> to use one, and exit to leave. On the desktop edition, you can also use Settings > Bluetooth.