Accessories
Edge 2 Kit Enclosure
The Edge 2 Kit is Edge 2 in a metal enclosure, supplied with two 2.4 GHz and 5 GHz Wi-Fi antennas. The enclosure has openings for every port on the edges of the board, and labels them on its panels.
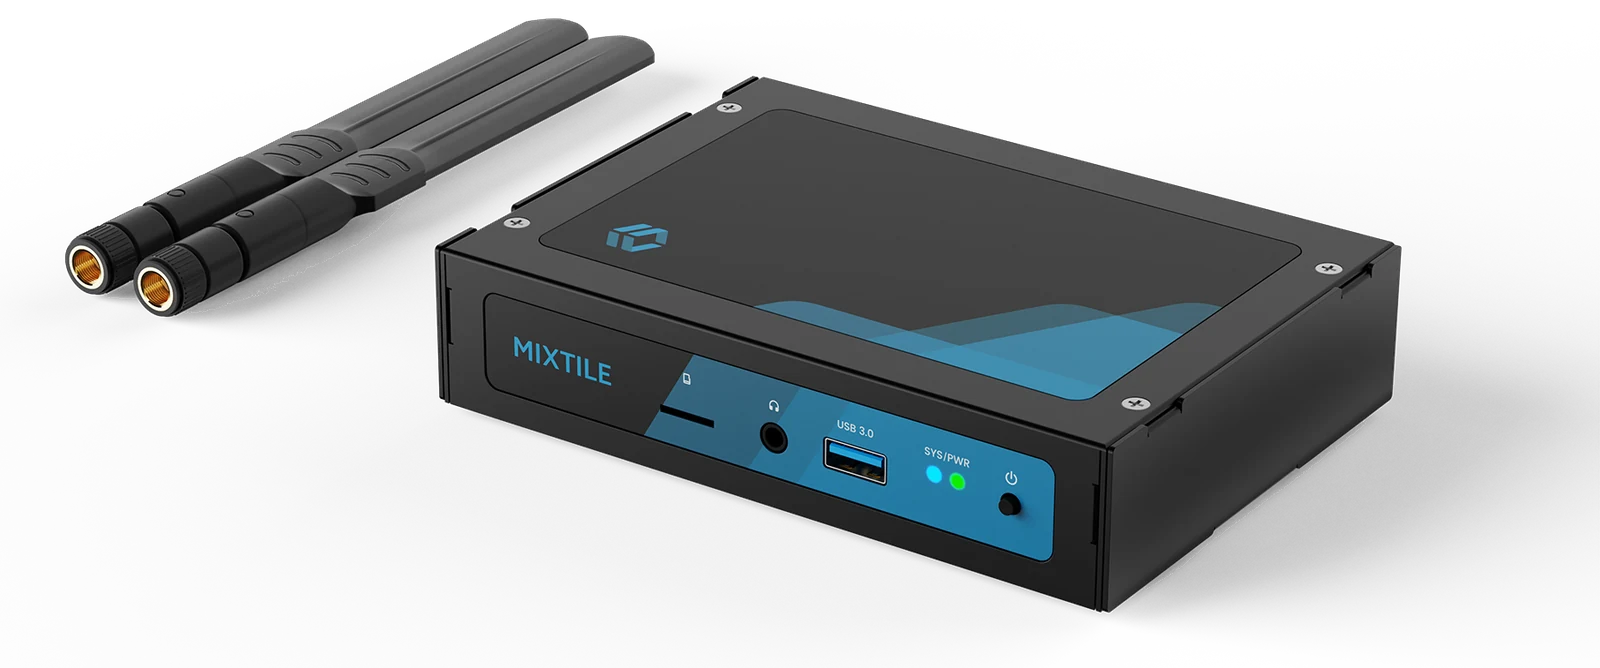
Figure 1. Edge 2 Kit
Specifications
| Item | Specification |
|---|---|
| Dimensions | 148 x 105 x 32 mm |
| Antennas | 2 x Wi-Fi antennas, 2.4 GHz and 5 GHz |
| Hardware versions | v1.0; v1.1, which adds DIN-rail mounting and a removable back cover |
| Compliance certificates | CE, FCC, RoHS, WEEE and RCM (ZIP) |
Panels
| Panel | Ports |
|---|---|
| Front | microSD slot, headphone jack, USB 3.0, SYS and PWR LEDs, power button |
| Rear | RESET, POWER (USB-C), 2 x USB 3.0, HDMI, RS-485 (G, B, A), Ethernet |
| Right side | SATA power connector, DC 12V jack |
| Left side | Opening for the U.2 connector |
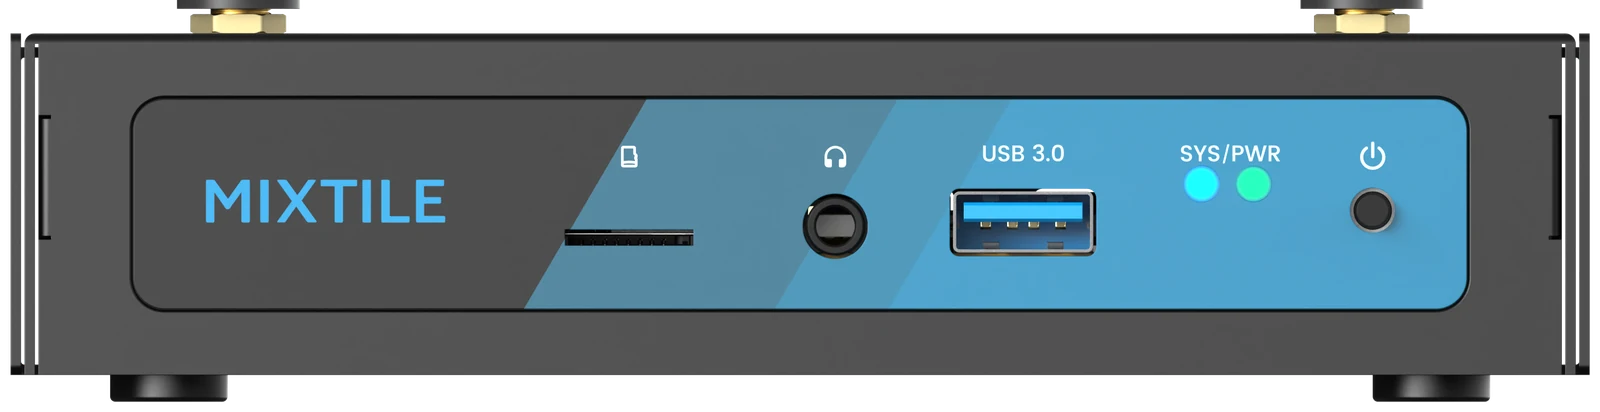
Figure 2. Front panel
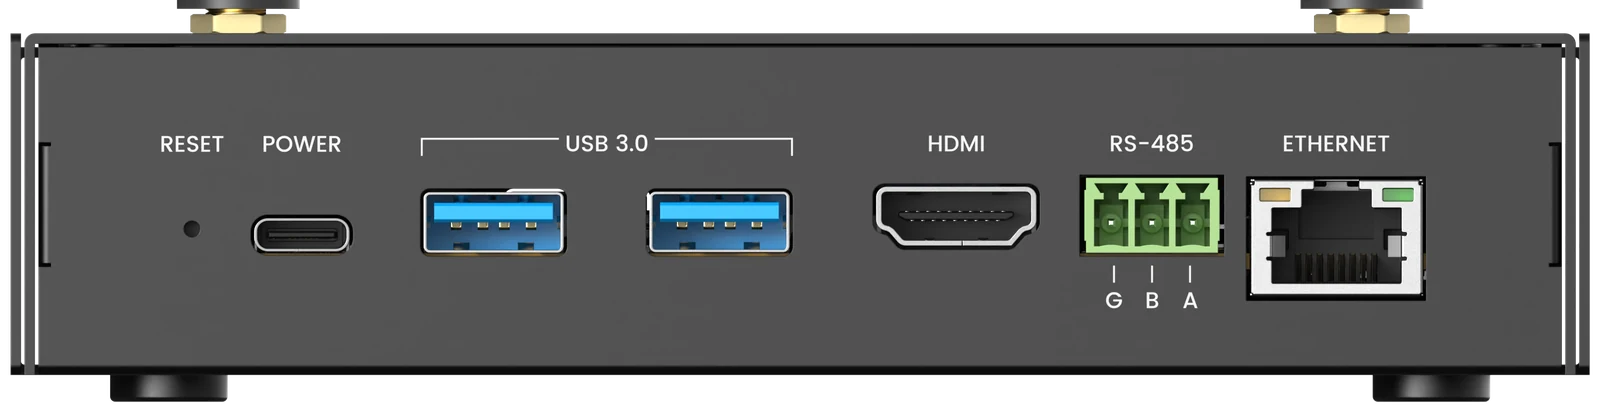
Figure 3. Rear panel. On the RS-485 terminal, G is GND, B is 485B and A is 485A.
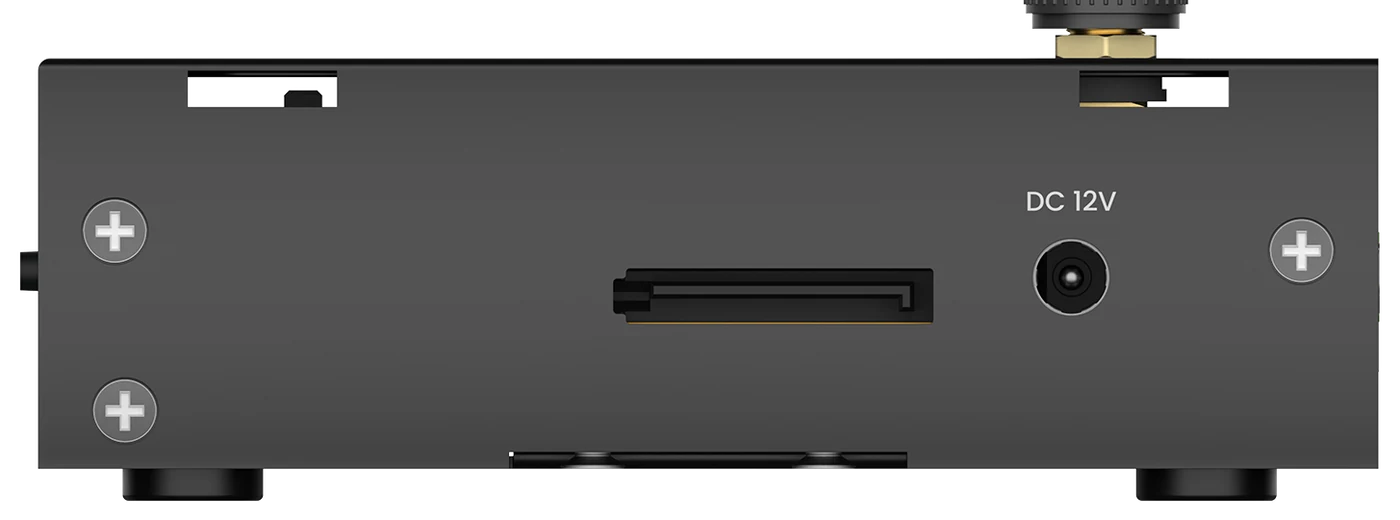
Figure 4. Right side
Fit the Antennas
Remove the protective caps from the two antenna connectors on the top of the enclosure. Screw the antennas on clockwise, and point them upwards.
Open the Enclosure
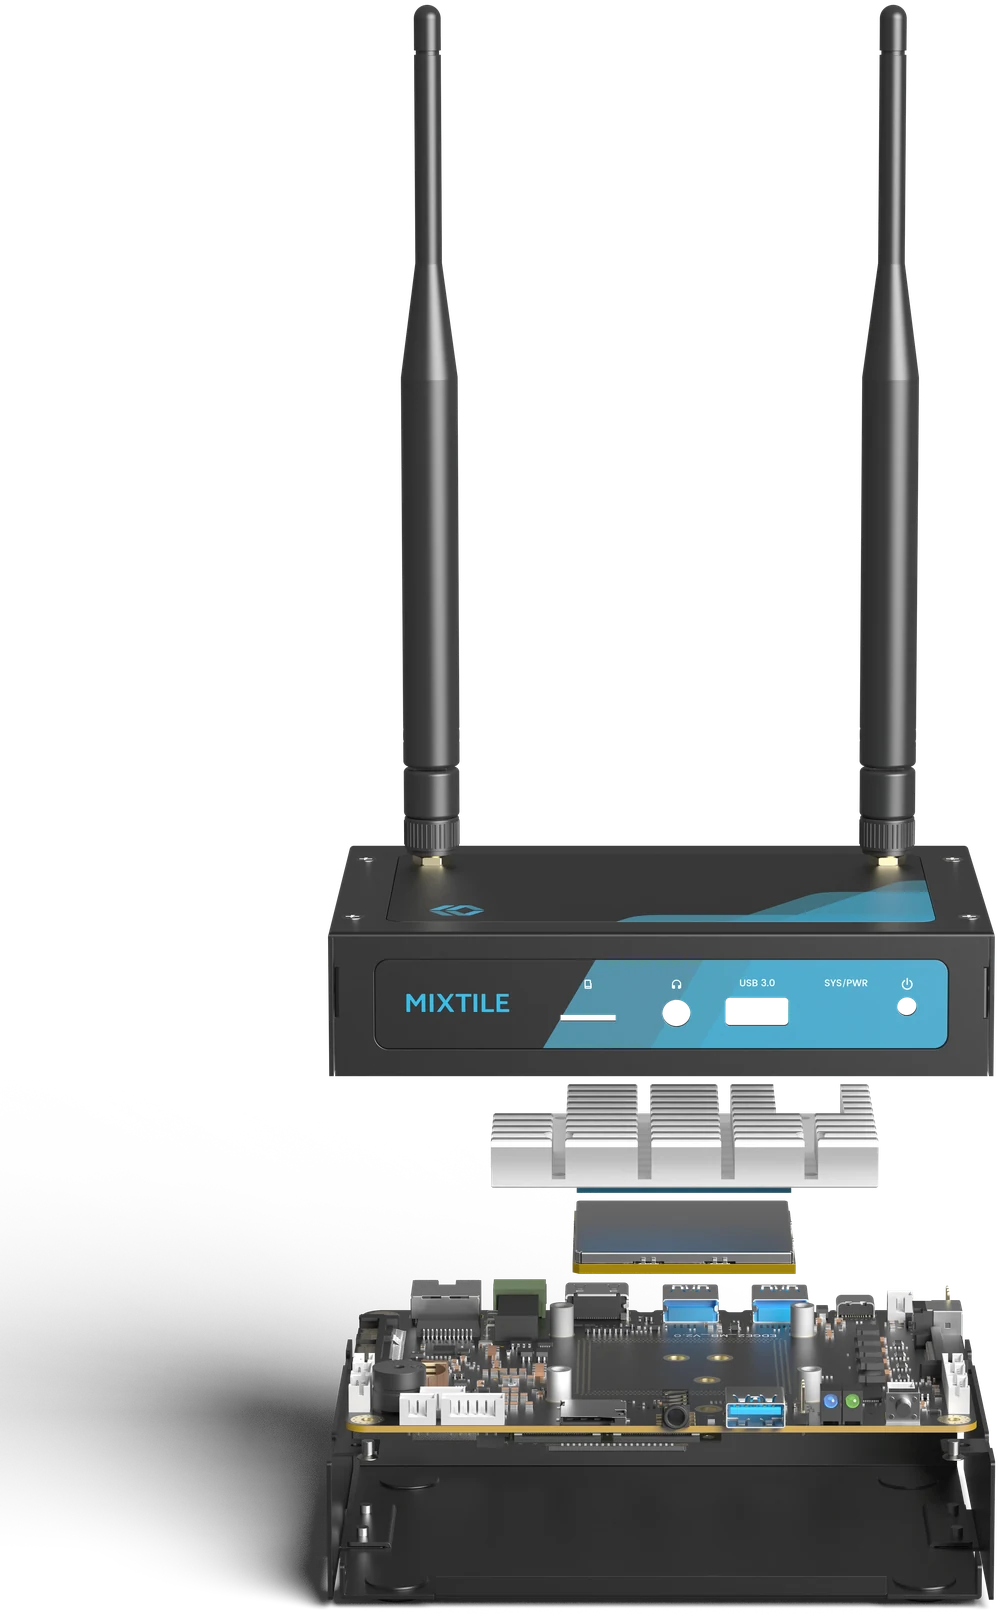
Figure 5. Exploded view of the Edge 2 Kit
Shut down Edge 2 and disconnect all cables before you open the enclosure.
- Top cover, the side with the antennas: remove it to reach the connectors on the top side of the board, including the MASKROM button, the debug UART, the UART, CAN, I²C and ADC connectors, and the RTC battery holder. Unscrew the antennas first.
- Bottom cover: remove it to reach the M.2 and Mini PCIe sockets and their SIM slots on the bottom side of the board.
2-in-1 Zigbee and Z-Wave Module
The Mixtile 2-in-1 Zigbee and Z-Wave mPCIe interface module adds a Zigbee radio and a Z-Wave radio to Edge 2, so that Edge 2 can act as a smart-home hub. It goes into the Mini PCIe socket and is designed for Home Assistant OS.
The module connects to the board over USB, and each radio appears as its own serial port. In Home Assistant OS on Edge 2 they are:
| Radio | Serial port |
|---|---|
| Z-Wave | /dev/serial/by-id/usb-1a86_USB_Dual_Serial_<serial>-if00 |
| Zigbee | /dev/serial/by-id/usb-1a86_USB_Dual_Serial_<serial>-if02 |
<serial> is the serial number of your module. In Home Assistant, both ports are listed as USB Dual_Serial; tell them apart by the end of the path.
Install the Module
-
Shut down Edge 2 and disconnect the power supply.
-
Turn the board over. If it is in the Edge 2 Kit enclosure, remove the bottom cover.
-
Insert the module into the Mini PCIe socket at an angle, press it down flat, and secure it with its two screws.
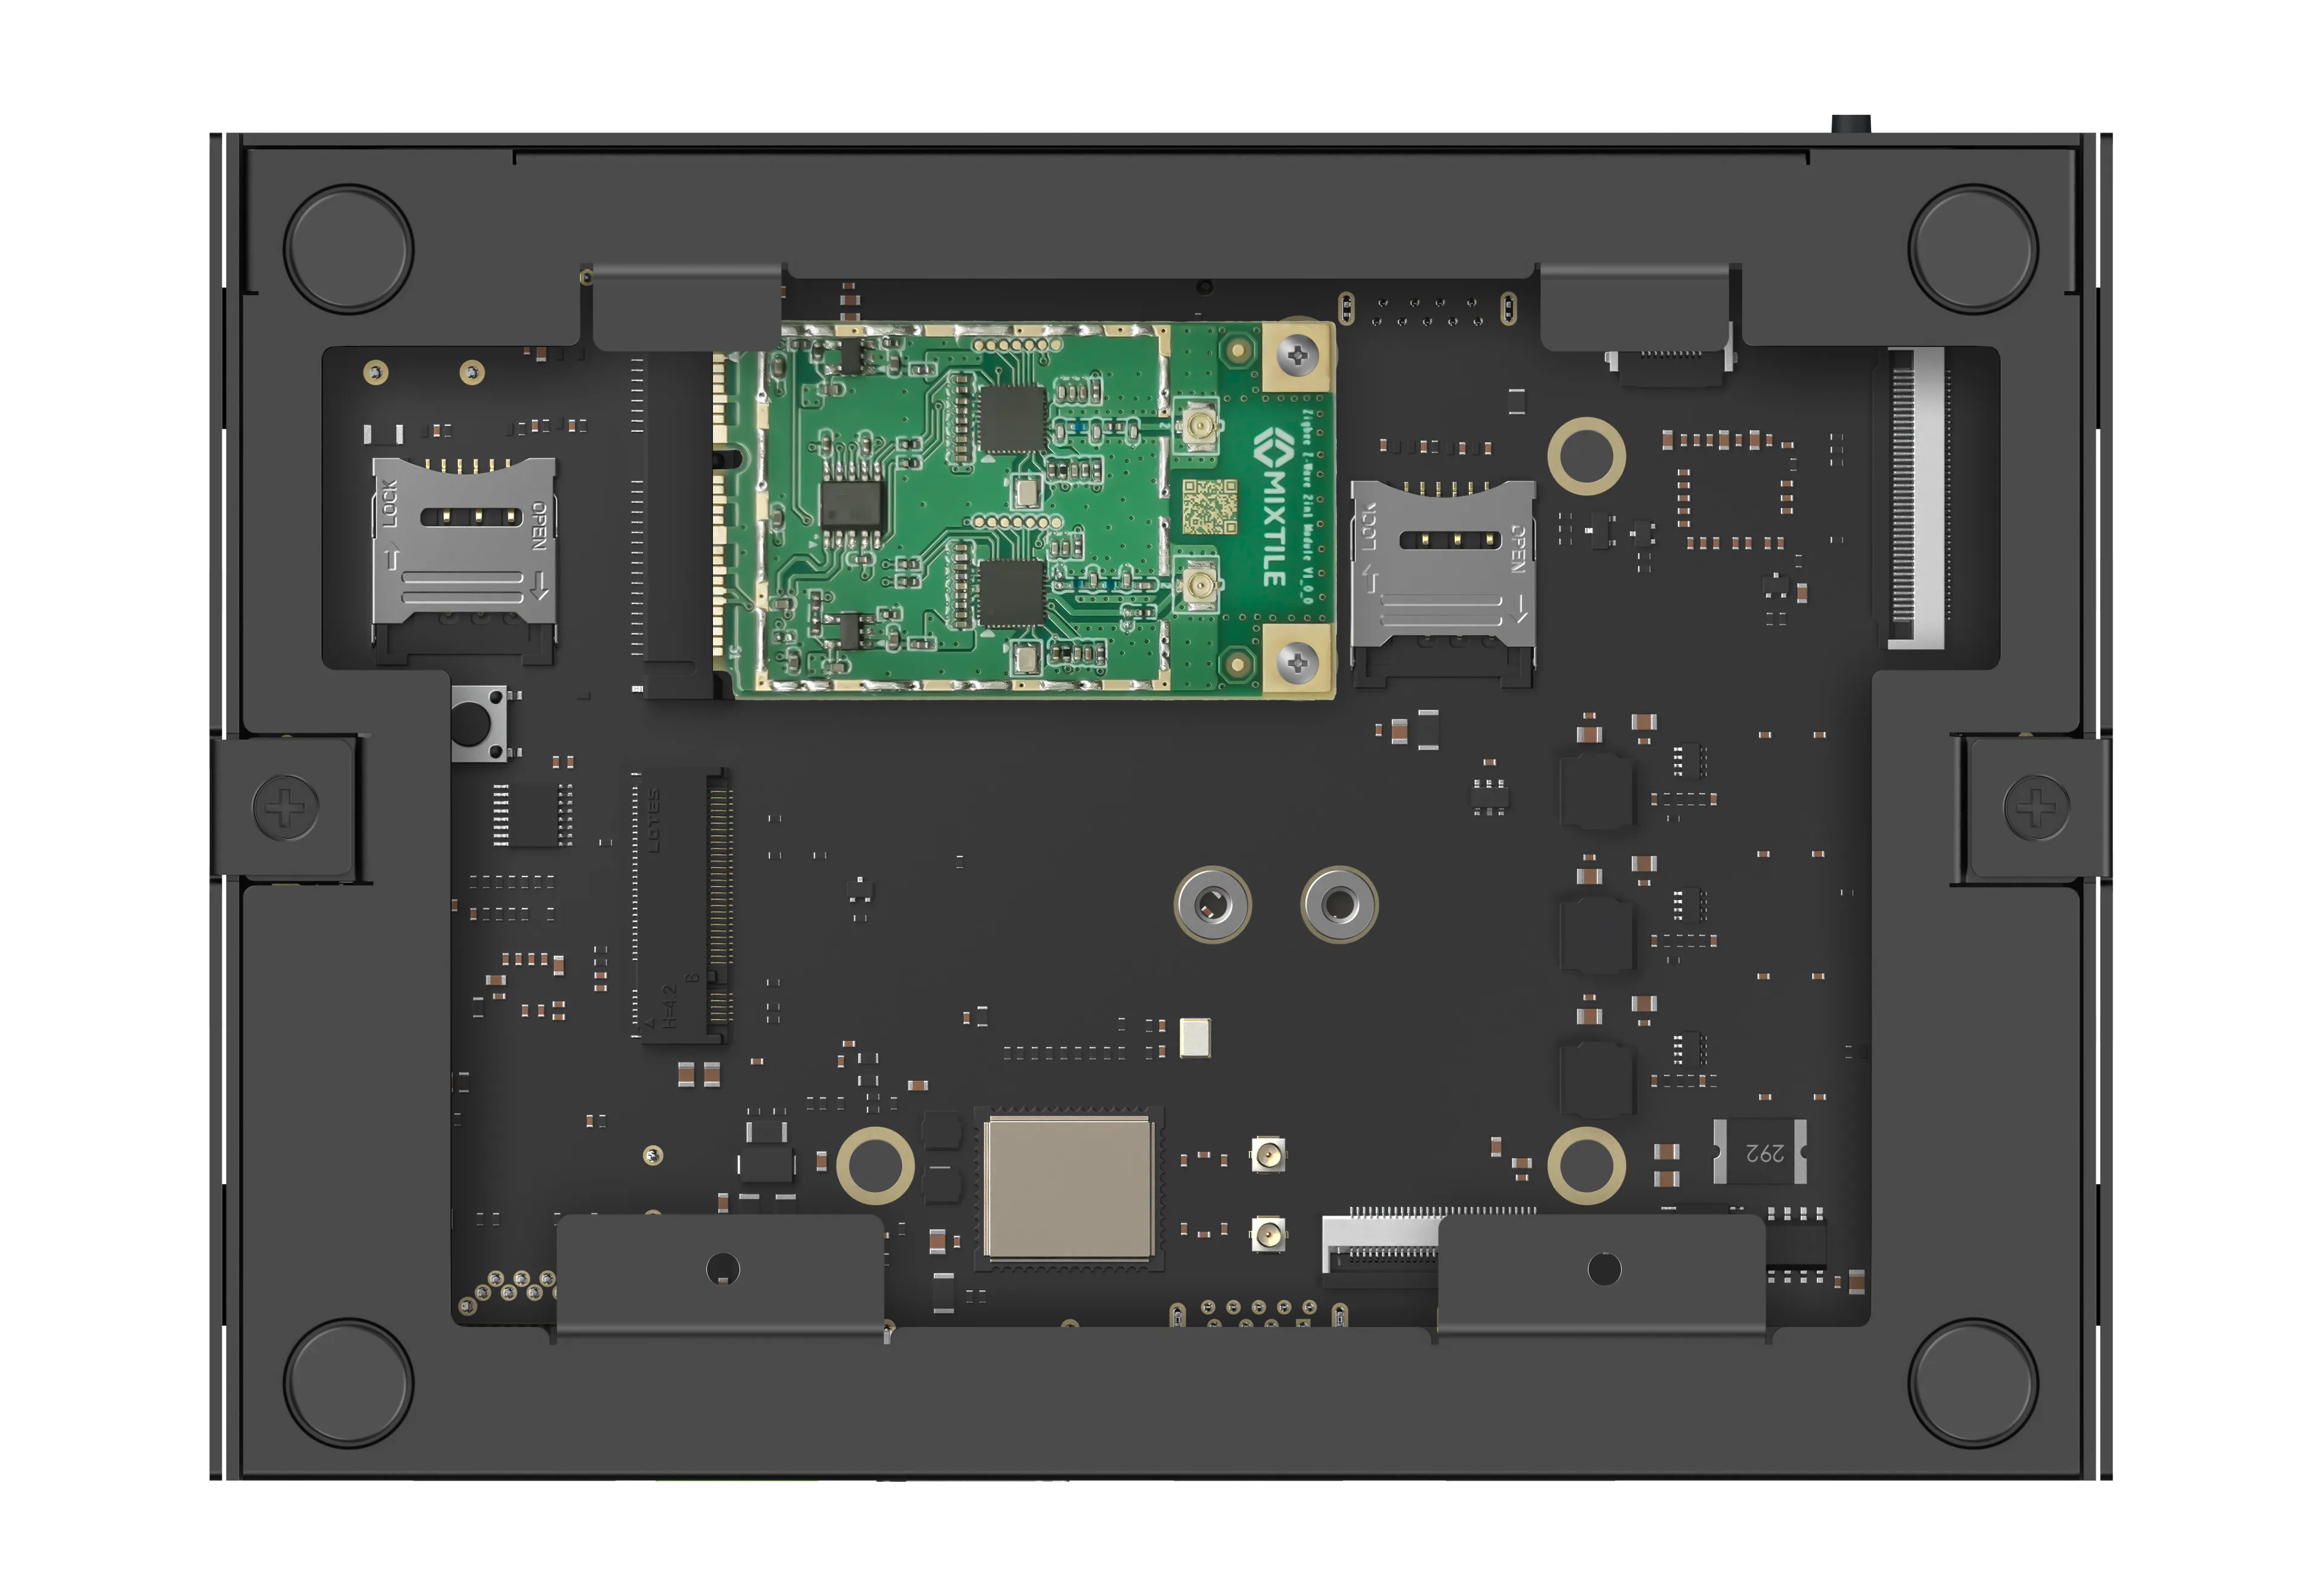
Figure 6. The module in the Mini PCIe socket
-
Connect the module's two antenna connectors to the Zigbee antenna and the Z-Wave antenna exactly as shown in Figure 7. Each radio needs its own antenna.
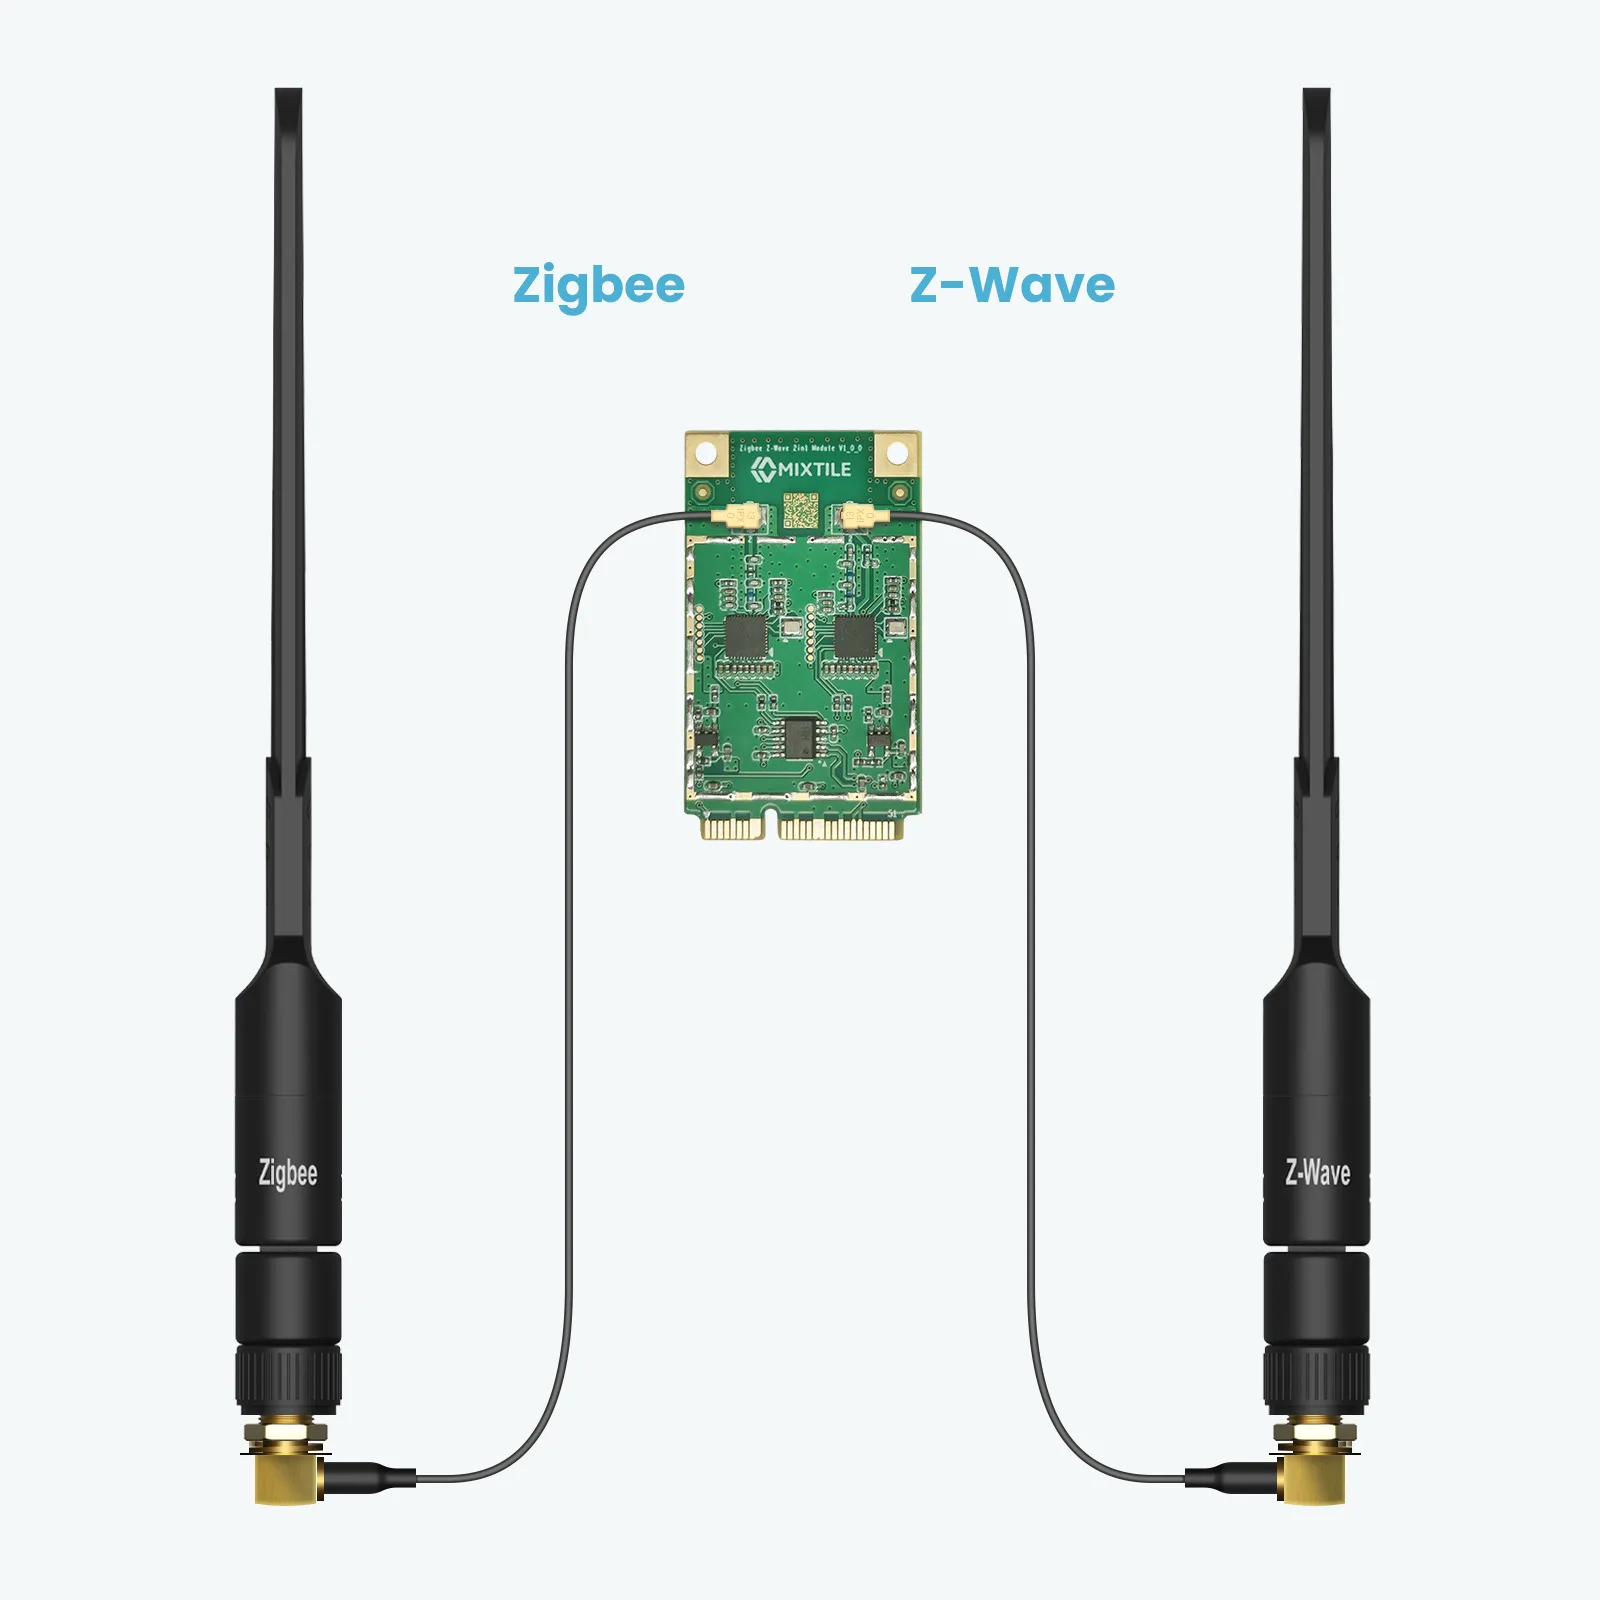
Figure 7. Antenna connections
-
Refit the bottom cover, if you removed it, and reconnect the power supply.
Use the Module
| Task | Guide |
|---|---|
| Set up Zigbee and Z-Wave in Home Assistant | Setting Up Zigbee and Z-Wave |
| Install the Mixtile add-ons for Home Assistant | Installing Mixtile Add-ons |
| Switch the Zigbee radio to Zigbee and Thread firmware | Flashing Zigbee and Thread Firmware |
| Update the Z-Wave firmware | Updating Z-Wave Firmware |
| Change the Z-Wave region | Using the Z-Wave Region Configurator |
| Use the module on a Raspberry Pi | Using the Module on a Raspberry Pi |