Flashing Zigbee and Thread Firmware
After installing MIXTILE Flasher (see Installing Mixtile Add-ons), you can follow this guide to flash the Zigbee & Thread firmware to support both Zigbee and Thread.
Disabling Zigbee Home Automation
Before starting the flasher, disable Zigbee Home Automation first (if you haven’t installed Zigbee Home Automation, skip this step):
-
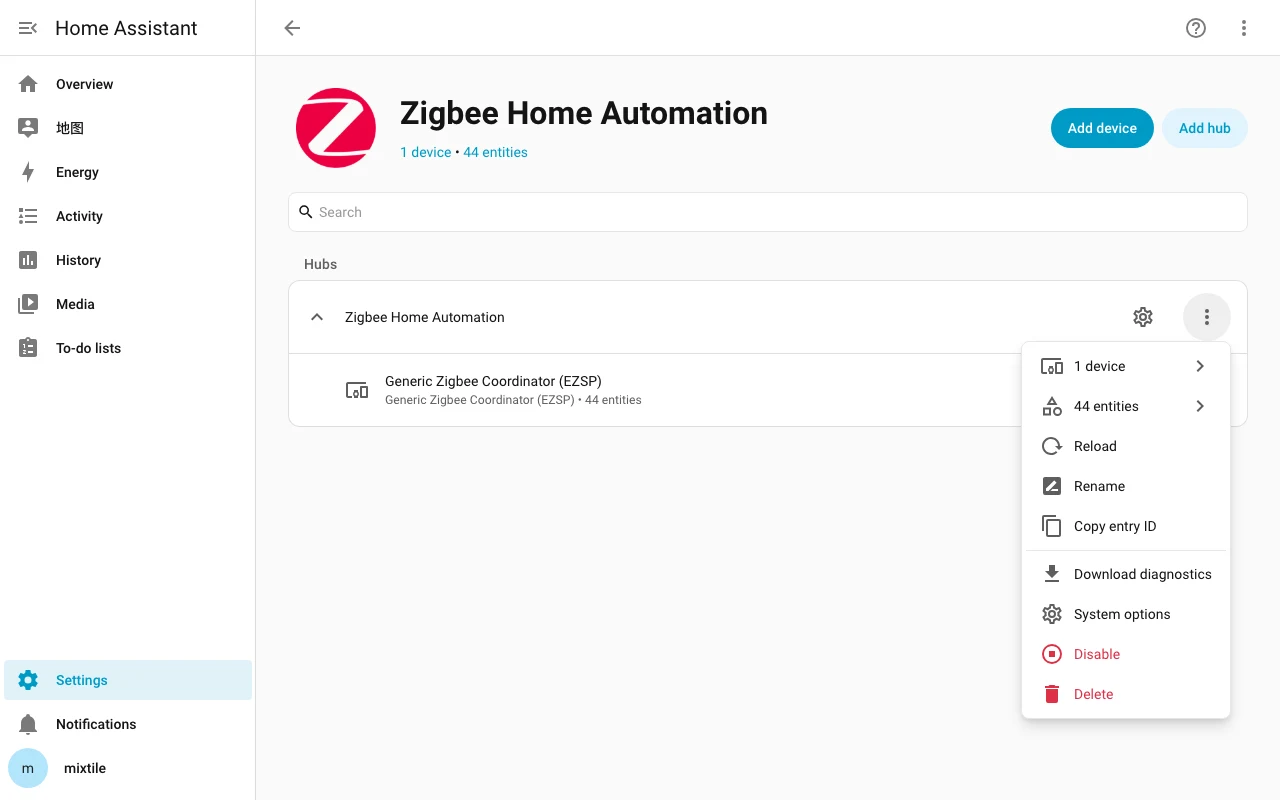
Click Settings in the side navigation bar, and then click Devices & services > Zigbee Home Automation.
-
On the Zigbee Home Automation row, click ⋮ > Disable:
Starting Mixtile Flasher
Now use Mixtile Flasher to flash the Zigbee & Thread firmware:
-
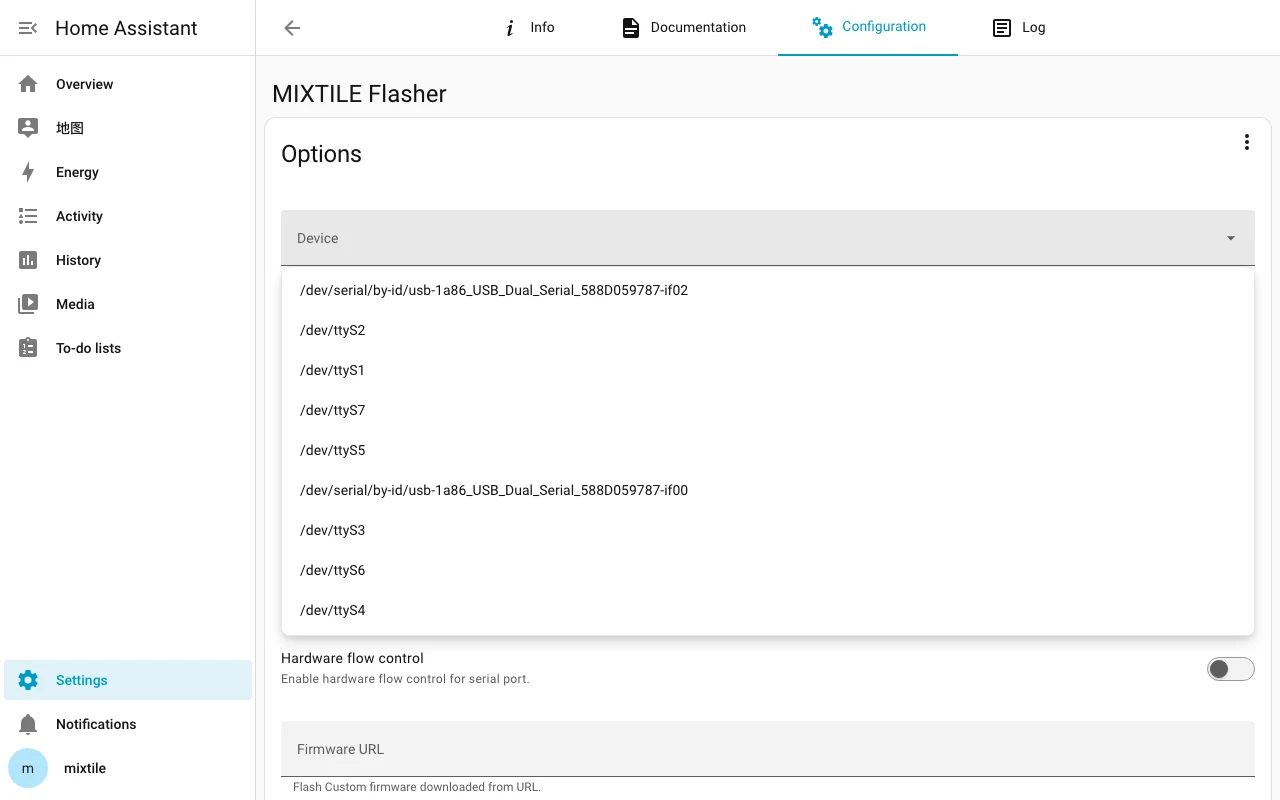
Click Settings in the side navigation bar, click Apps > MIXTILE Flasher, and choose the Configuration tab.
-
Select the
USB Dual_Serialdevice whose path ends in-if02in the Device field, set Firmware URL tohttps://github.com/focalcrest/Mixtile-EDGE2-Firmware/raw/main/Zigbee&Thread/Zigbee&Thread_v1.0.0.gbl, and click Save:
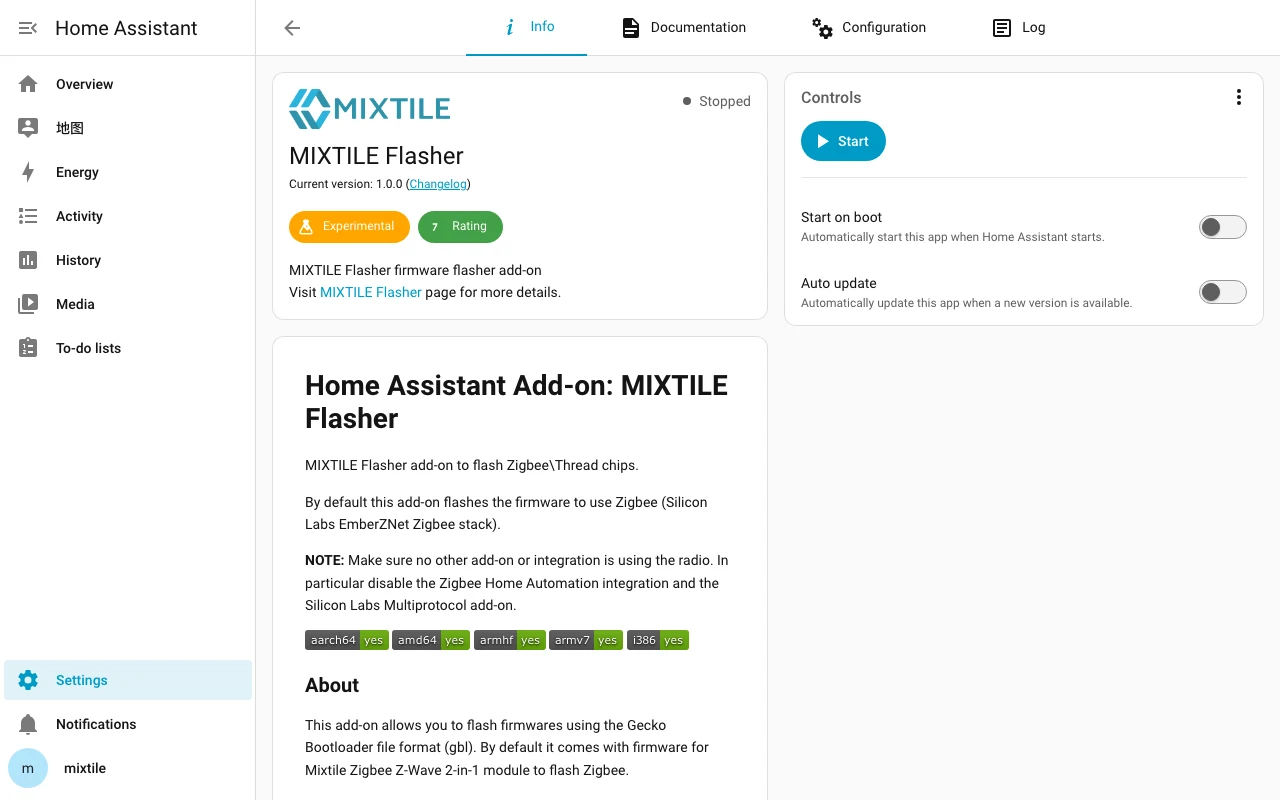
- Choose the Info tab and click Start to start flashing the firmware:
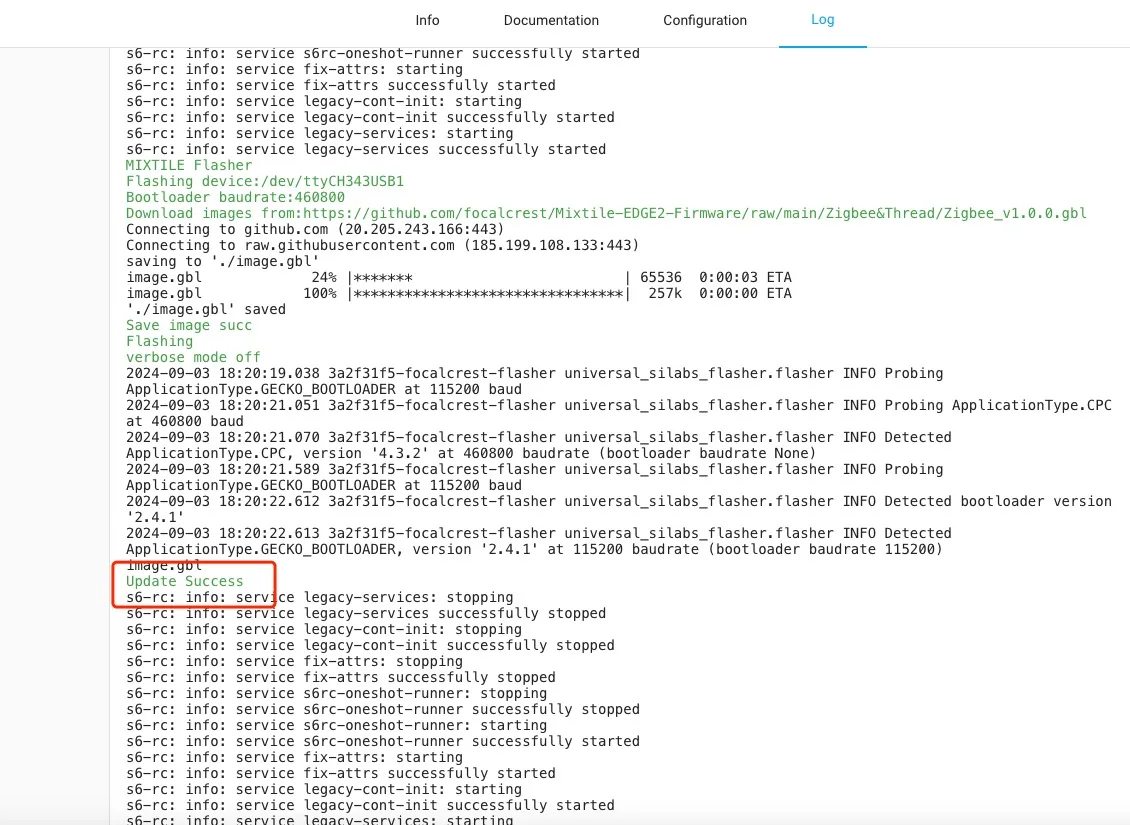
- Choose the Log tab to monitor the flashing process. You can scroll down to click the REFRESH button to update the logs. When
Update Successis displayed, the flashing process is complete.
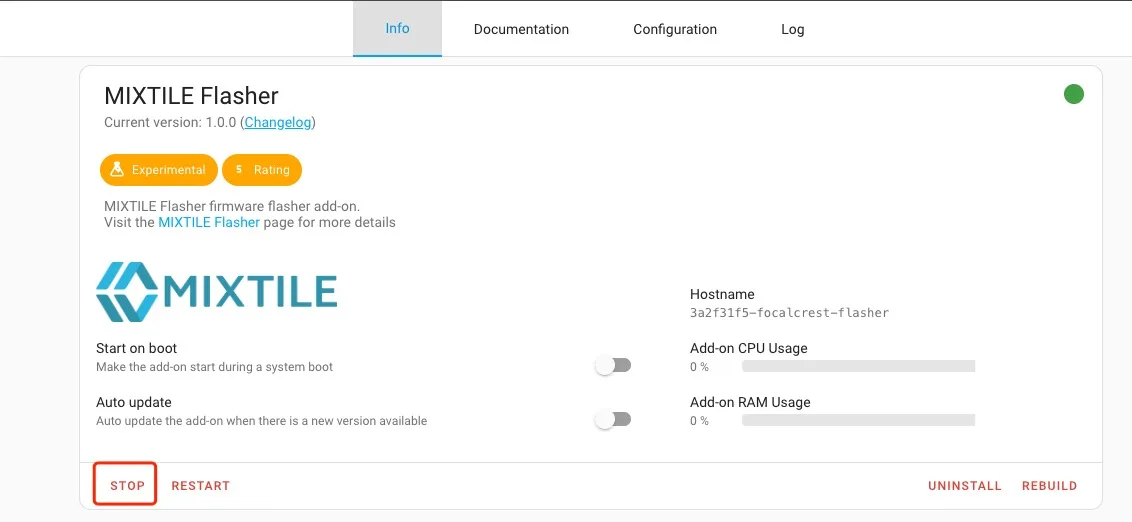
- Go back to the Info tab and click STOP to stop MIXTILE Flasher:
Utilizing Silicon Labs Multiprotocol
Home Assistant uses Silicon Labs Multiprotocol to allow the device’s Silicon Labs chip to connect to both Zigbee and Thread networks with one radio. Configure it as follows:
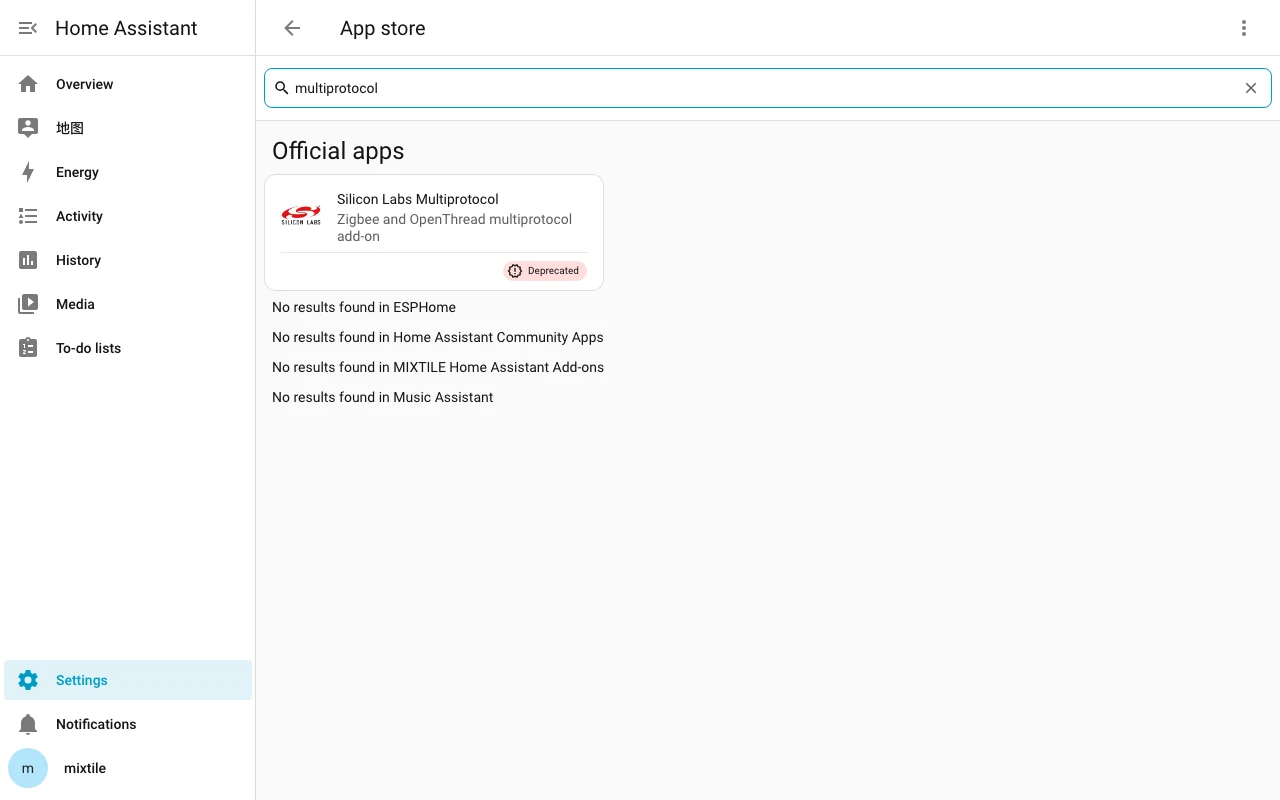
- Click Settings > Apps > Install app, type "multiprotocol" in the search box, click Silicon Labs Multiprotocol, and click Install:
-
On the Silicon Labs Multiprotocol page, choose the Configuration tab:
-
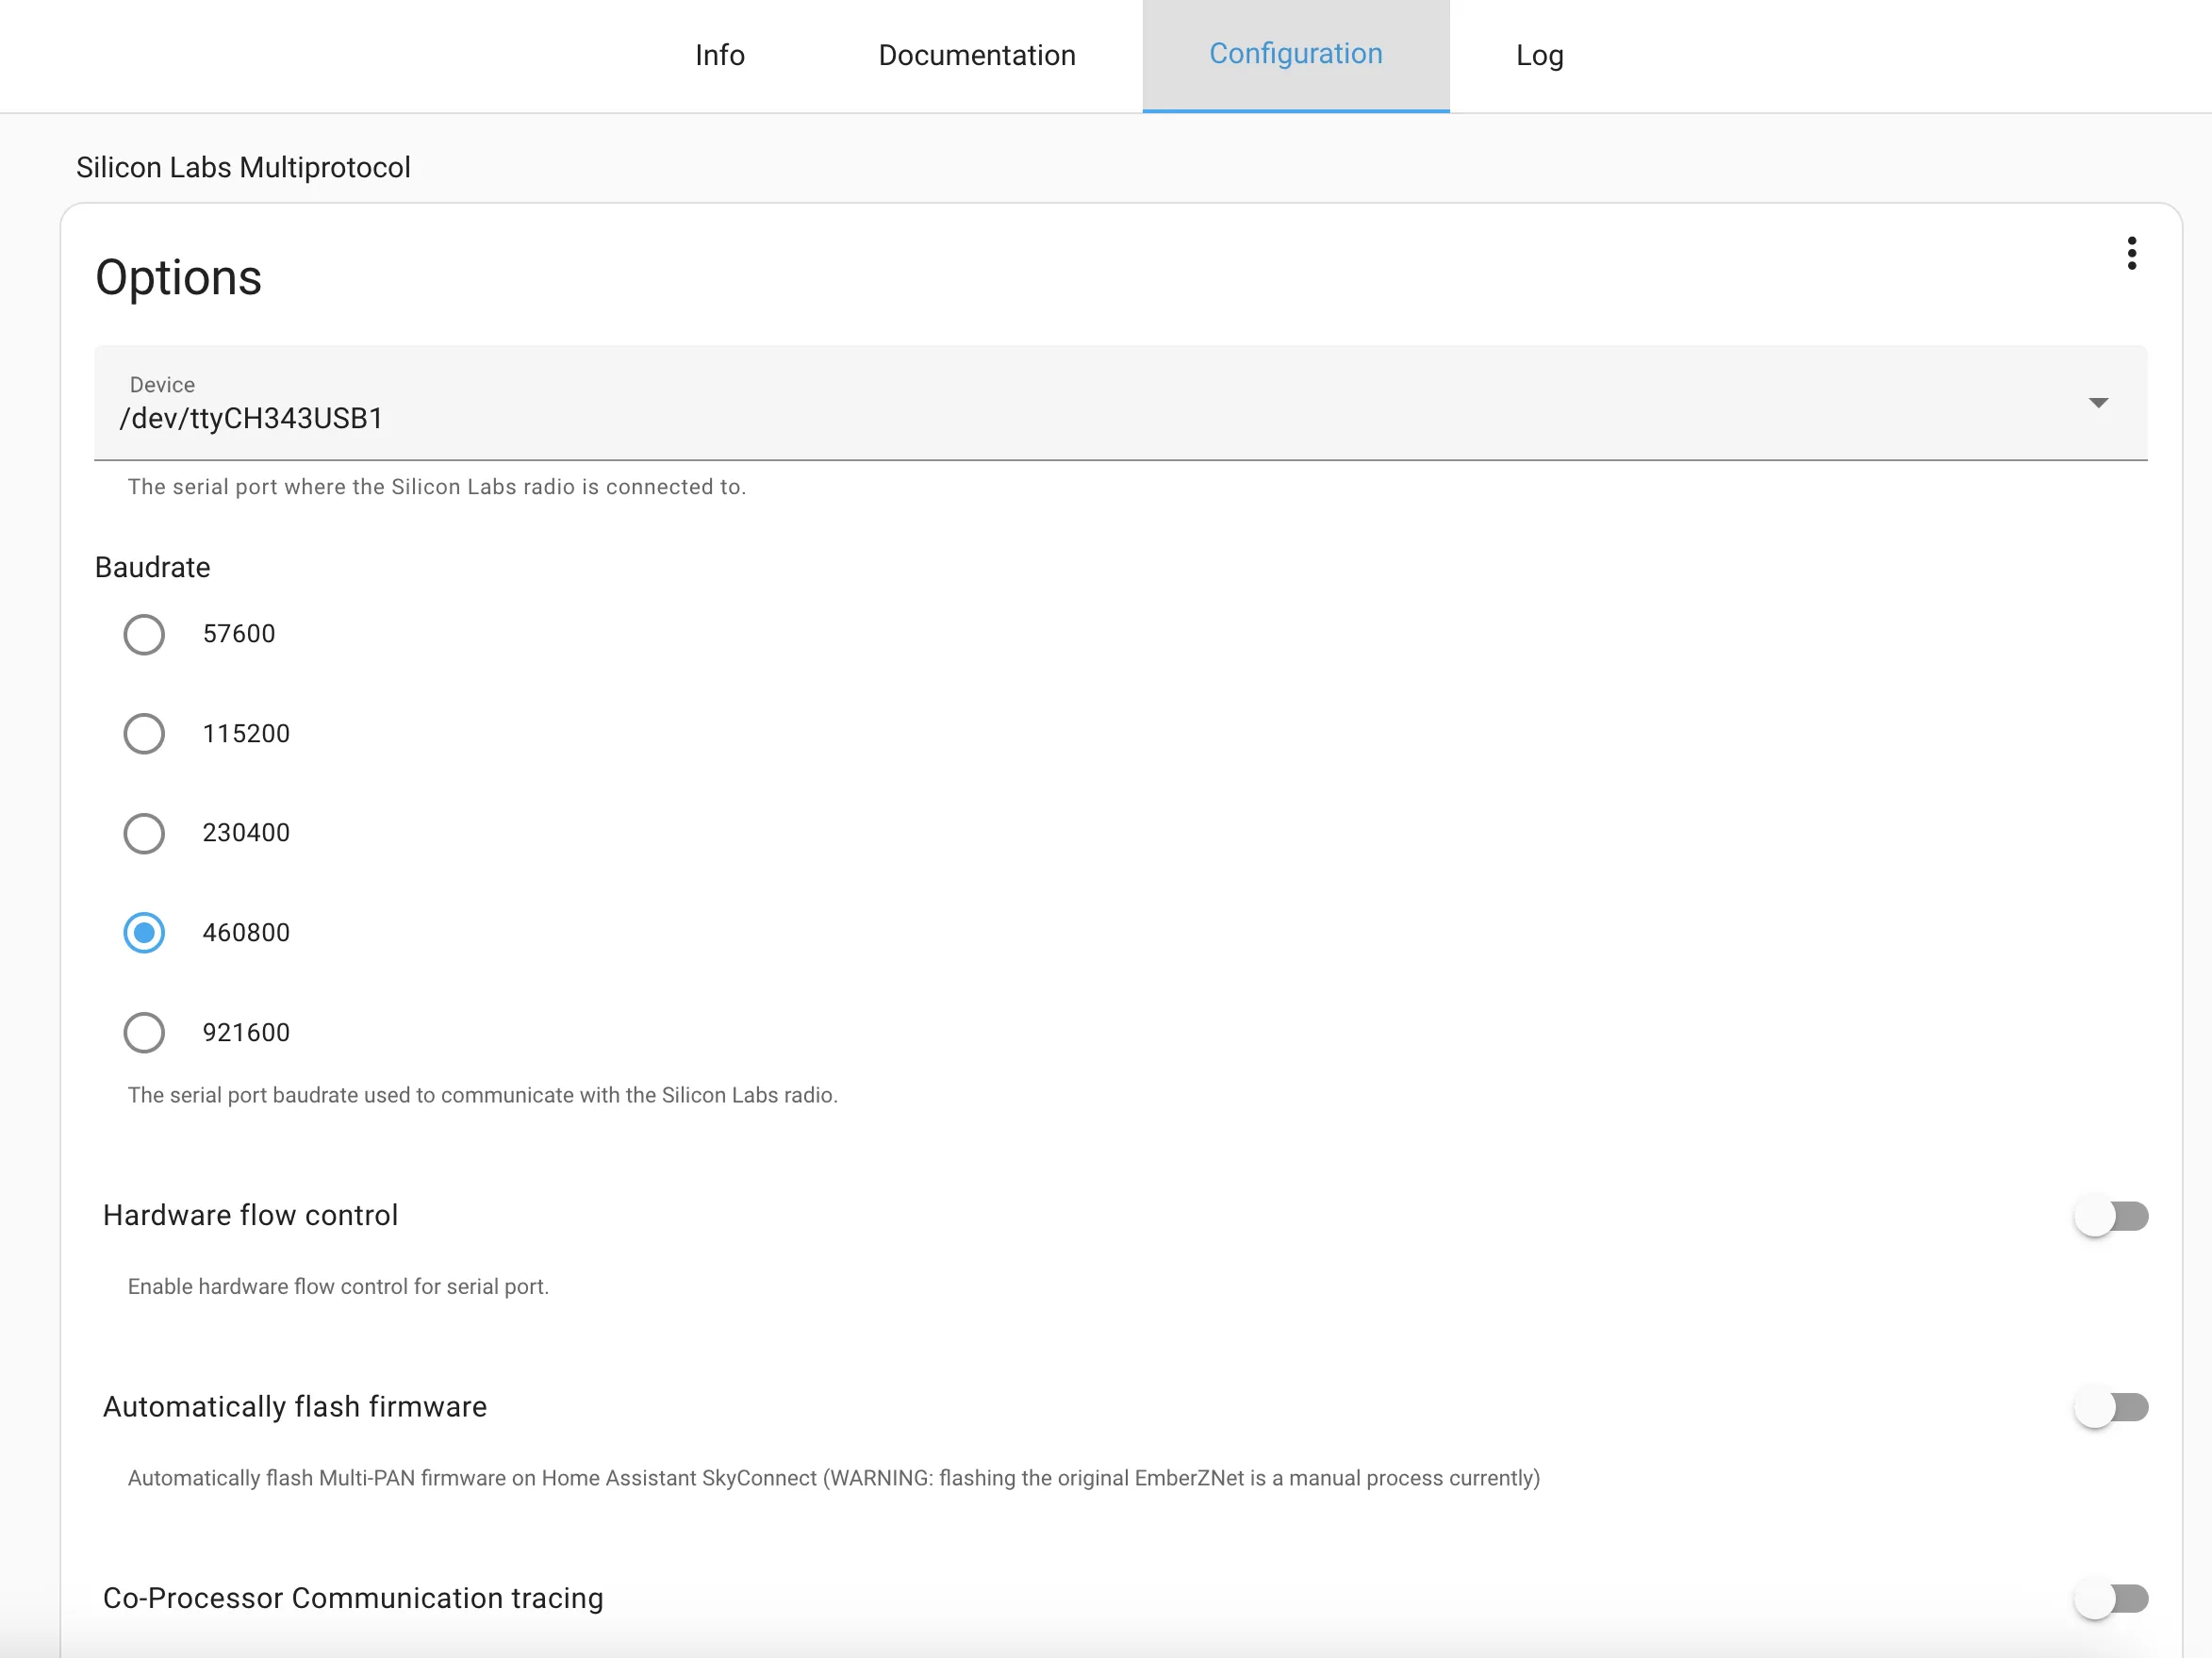
Set Device to the
USB Dual_Serialdevice whose path ends in-if02, disable both Hardware flow control and Automatically flash firmware, and click Save:
- Go back to the Info tab and click START to start running Silicon Labs Multiprotocol:
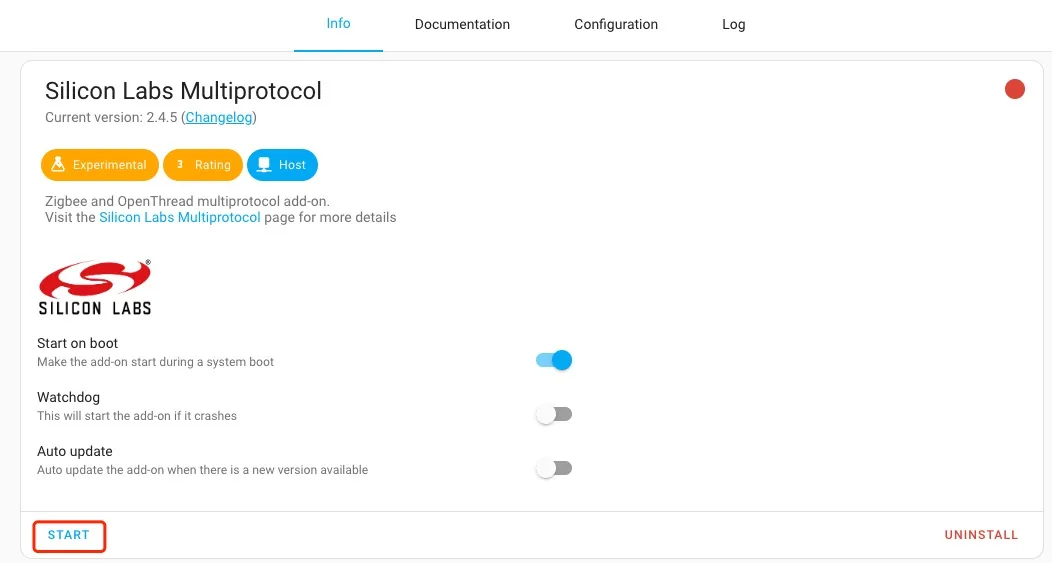
Stay on this page until it’s successfully started as shown in the image below:
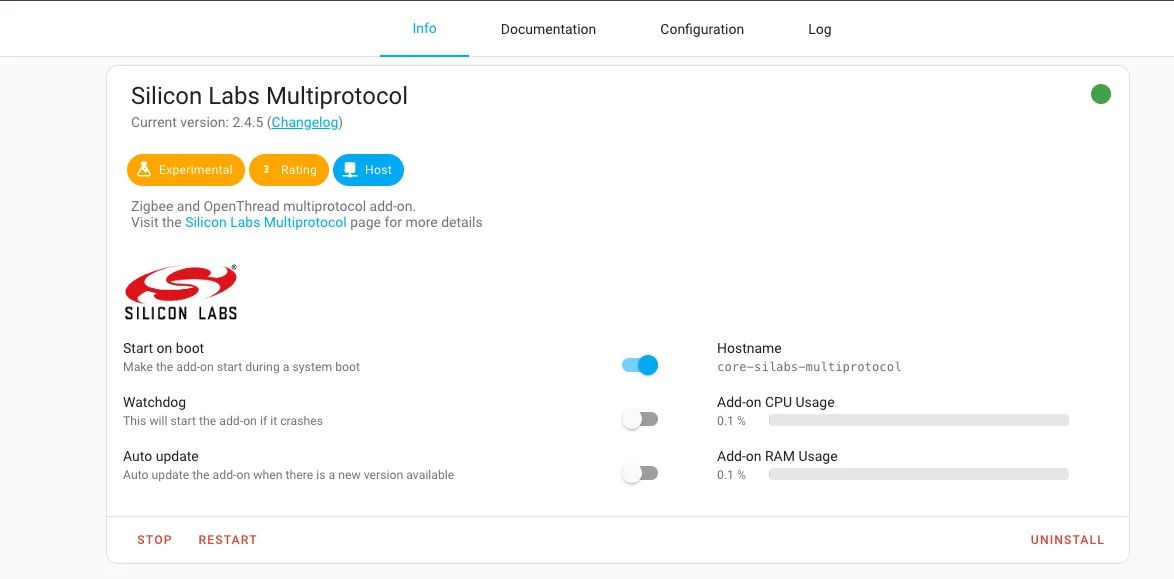
- When the add-on is started, click Settings> Devices & services > Thread, and click Configure:

- Make
Silicon Labs Multiprotocolthe preferred network:
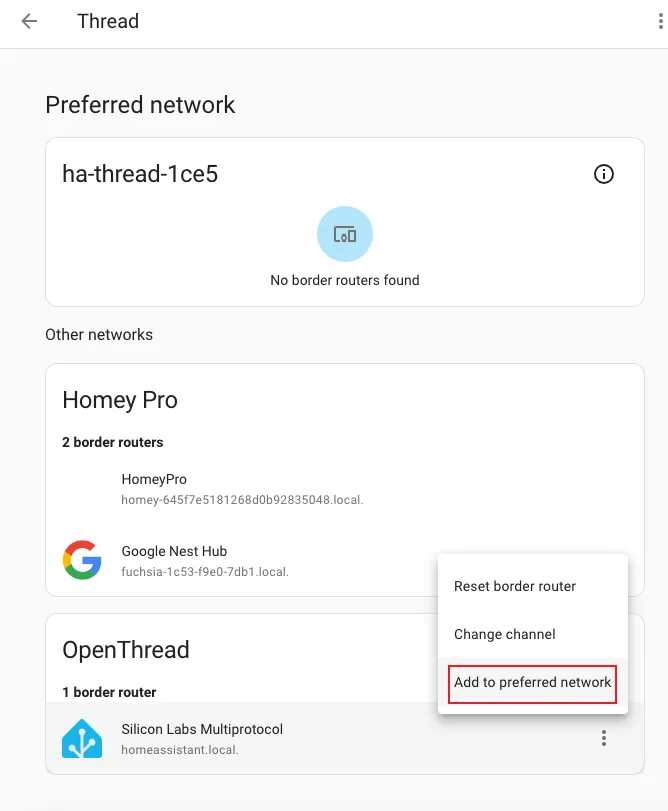
Adding Zigbee Home Automation back
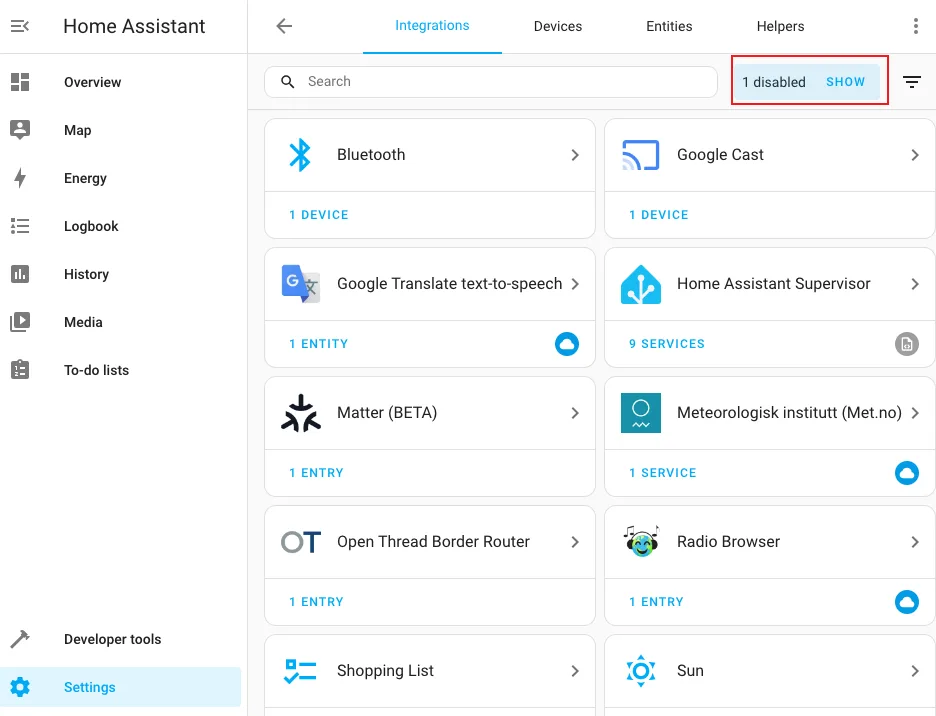
- Click Settings > Devices & services and then click the SHOW button in the upper-right corner:
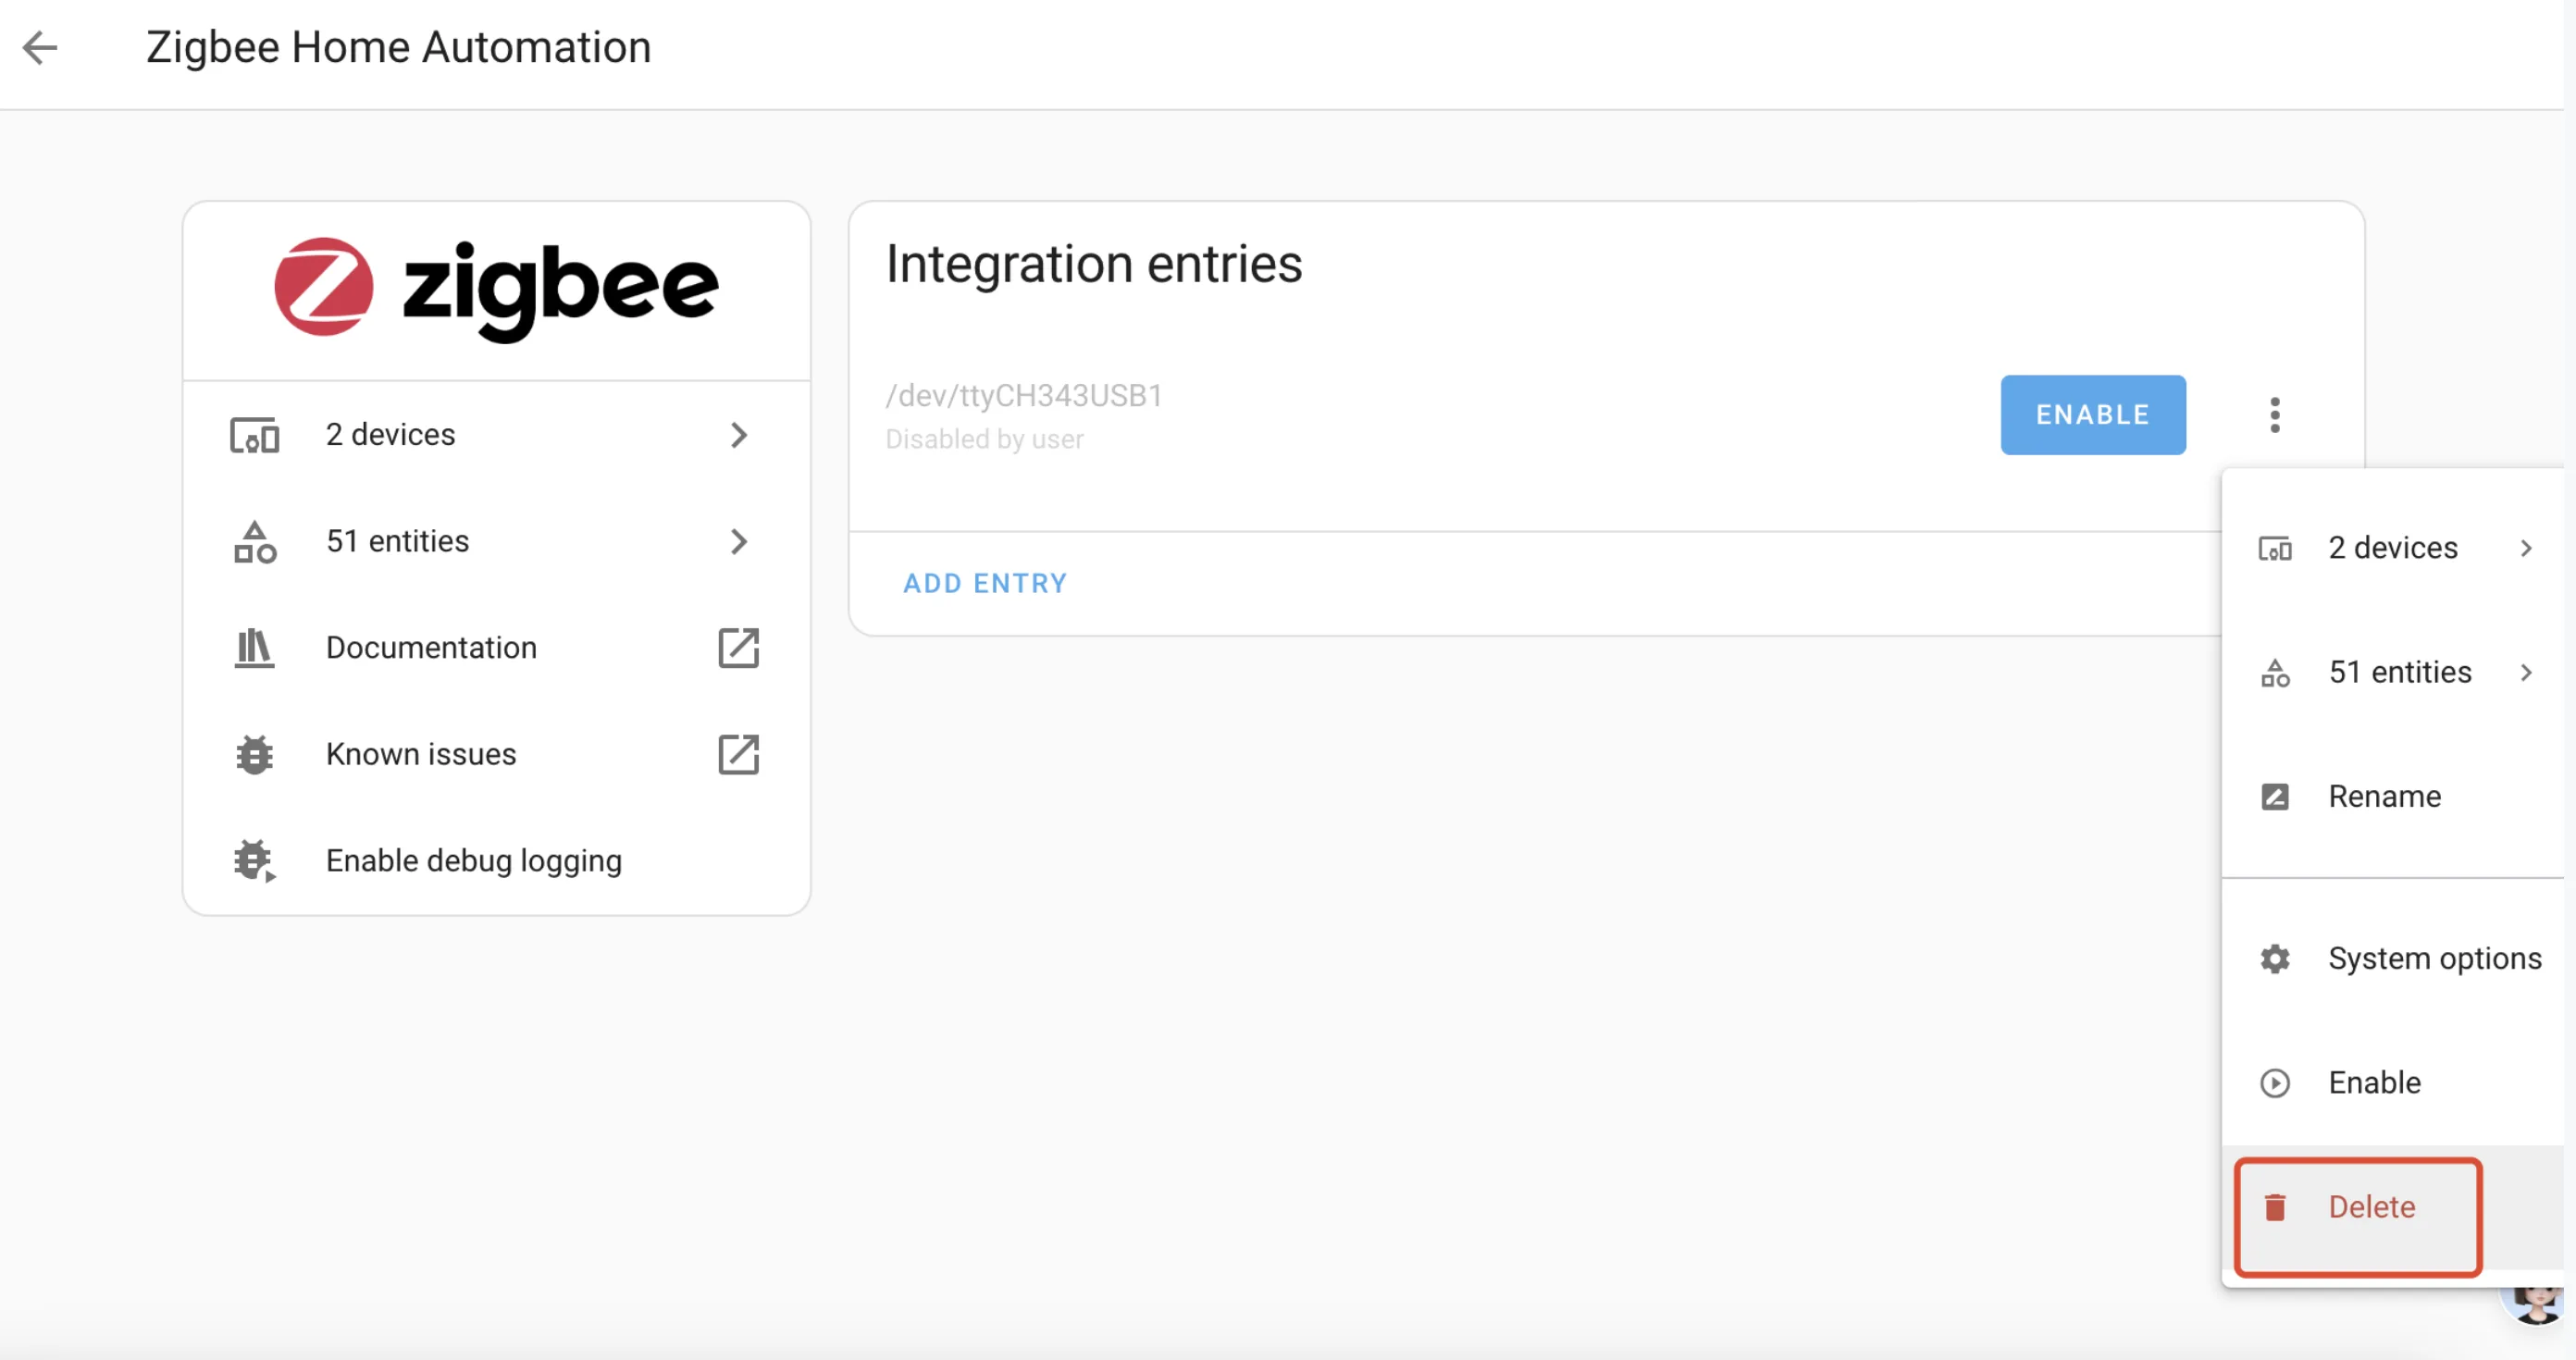
- Find Zigbee Home Automation again and click ┇ > Delete:
- Click ADD INTEGRATION and type "Zigbee" to find
Zigbee Home Automationagain. You should see thatSerial Device Pathcan now be set tosocket://core-silabs-multiprotocol:9999 - Multiprotocol add-on - Nabu Casaas shown below. Click Submit:

- Click Submit on the radio type page:
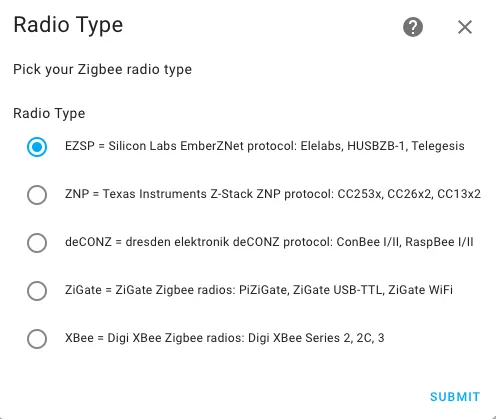
- Click Submit on the serial port settings page:

- Set the network formation as needed:

Zigbee has now been added back to Home Assistant. You can select an area for it:

Now your firmware should support both Zigbee and Thread. You can add Zigbee and Thread devices as you like.